Throughout my experience using Hyper-V on Windows, if my virtual machine is using a static IP, then if my virtual machine or my laptop is restarted, my virtual machine’s IP will change automatically, even though I have created a static IP on my virtual machine. So I had to change the settings in a few places to keep up with the IP changes on my virtual machine, and it’s very tiring. However, I plan to make the virtual machine’s IP address on Hyper-V static.
Problem
How to make a virtual machine’s IP address on Hyper-V static?
Solution
When you create a virtual machine in Hyper-V, it will use the Default-Switch connection by default. This connection usually has a class B IP, like in the image below on my laptop:

If I create a virtual machine in Hyper-V, it will usually get an IP in class B as well, and it will change if there is a restart on my virtual machine or my Windows laptop. Therefore, I want to create a static IP in class C on my virtual machine in Hyper-V.
A. On Windows
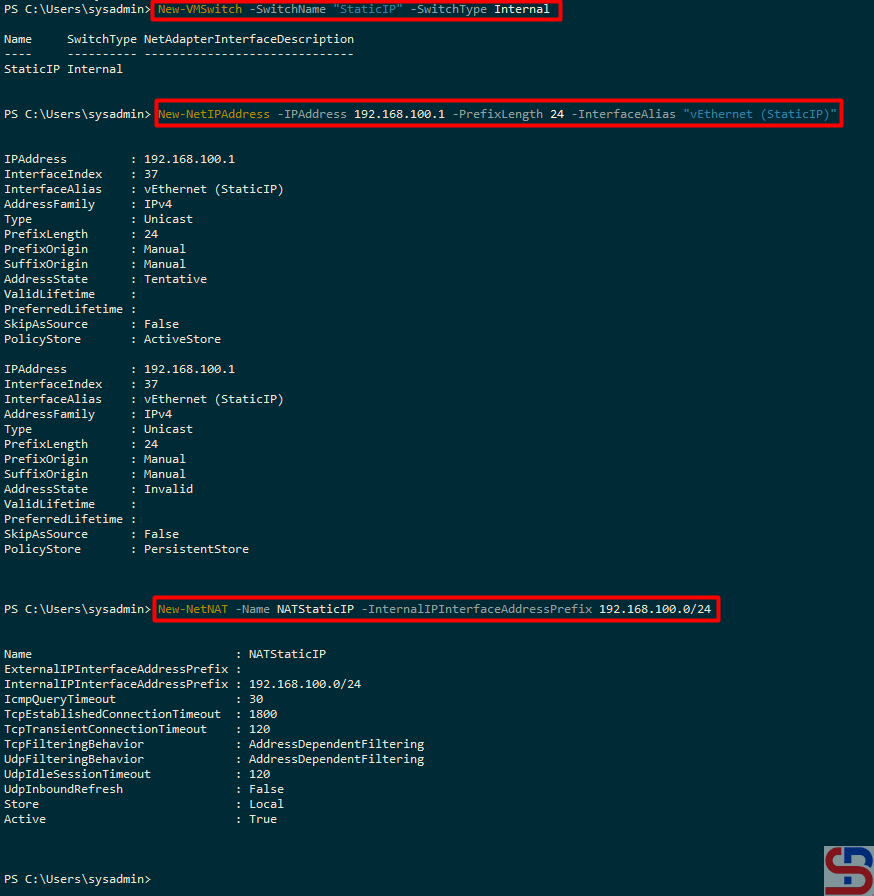
First, I have to create a new Virtual Switch, which I call StaticIP, and I write the following command in PowerShell:
New-VMSwitch -SwitchName "StaticIP" -SwitchType Internal
On the new Virtual Switch, I have to enter the IP address 192.168.100.0/24, so I type in PowerShell like the command below:
New-NetIPAddress -IPAddress 192.168.100.1 -PrefixLength 24 -InterfaceAlias "vEthernet (StaticIP)"
After that, I created an IP NAT for the new Virtual Switch by typing in PowerShell:
New-NetNAT -Name NATStaticIP -InternalIPInterfaceAddressPrefix 192.168.100.0/24
Then there should be a display as in the image below:
B. Check the Connections
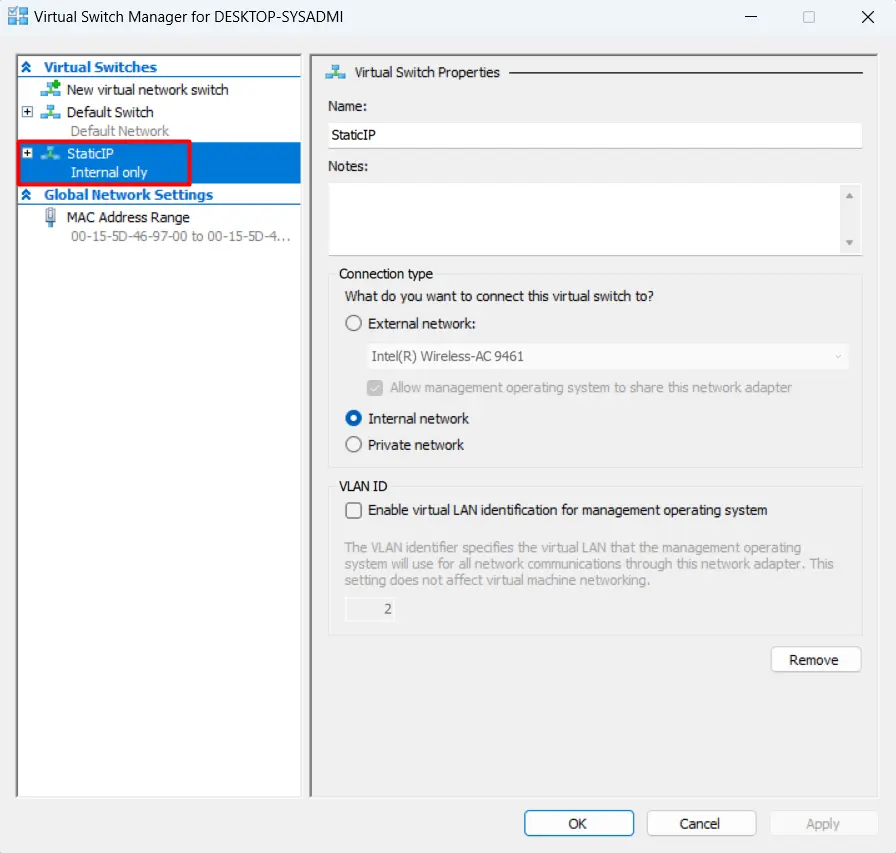
On Hyper-V Manager, there will be a new Virtual Switch Manager named StaticIP as shown below:
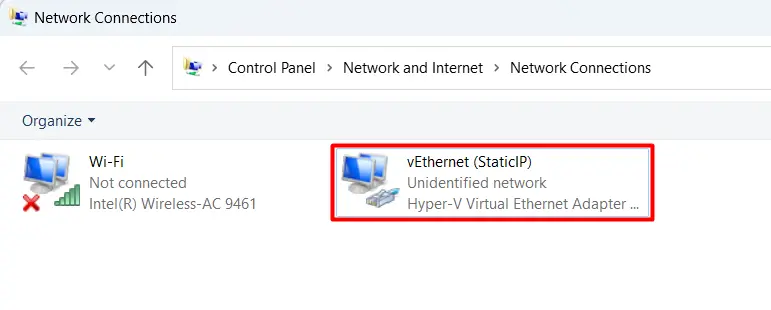
In the Network Connections section, there will be a new adapter as shown below:
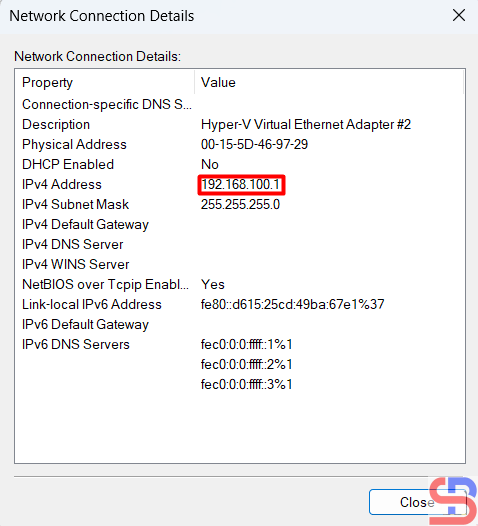
And the IP of the new adapter is 192.168.100.1 as shown below:
Or if you want a more complete IP for all adapters can be seen in the image below:

B. On a Virtual Machine
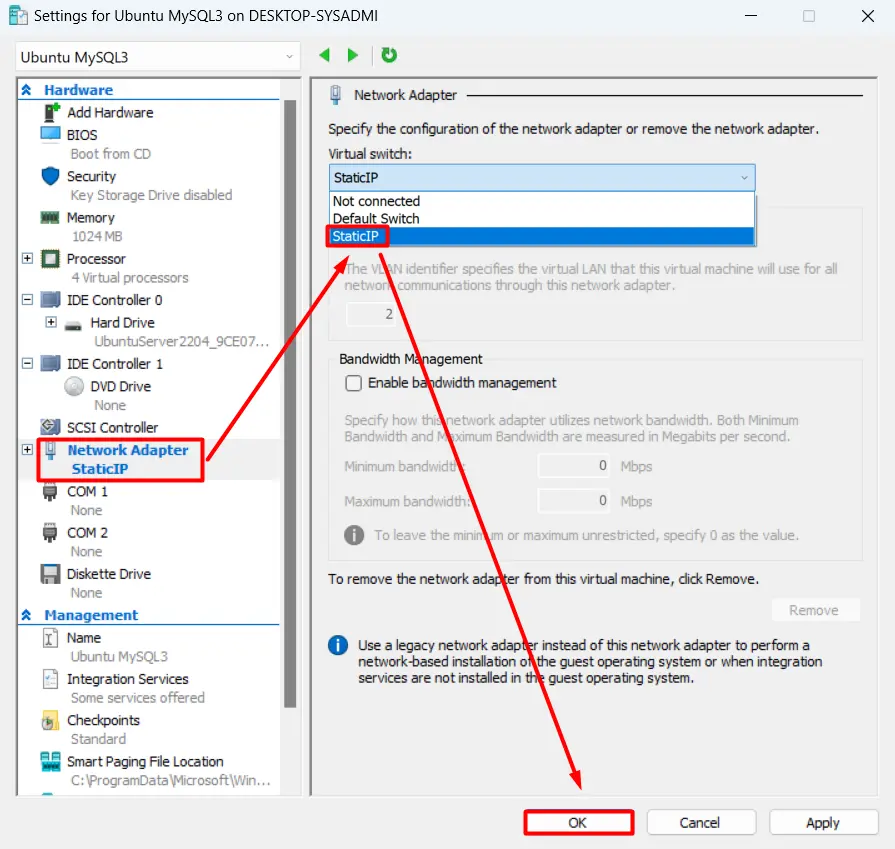
If you have previously created a virtual machine, change the virtual machine settings in the Virtual Switch section, select StaticIP as shown below, and then click the OK button:
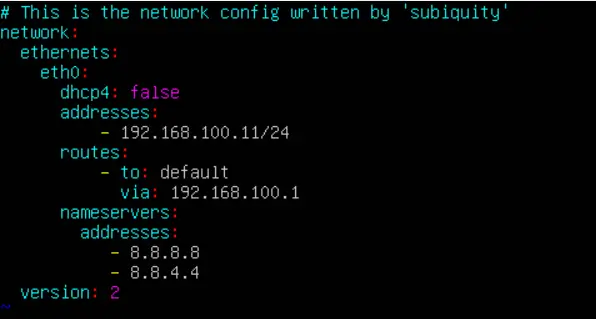
After that, log in to the virtual machine and change the IP. Because I am using Ubuntu, I changed it in the netplan section as shown below:
After that, I restarted the network and saw the changed IP as in the picture below:
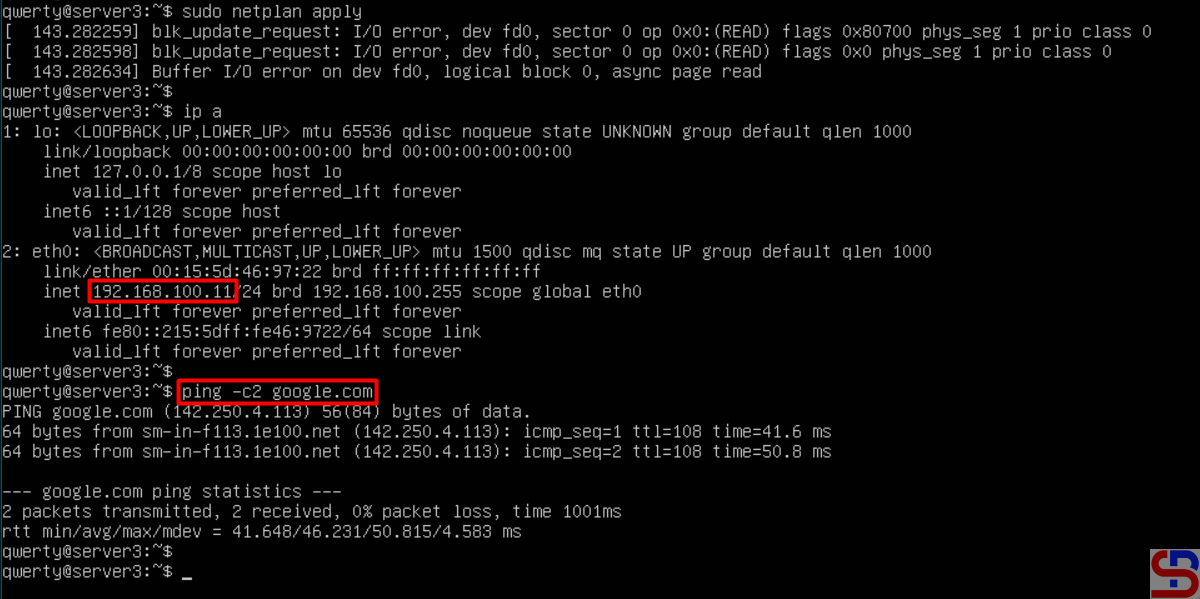
Based on the picture above, my virtual machine can connect to the internet, making it easier for me to install something from the internet on my virtual machine. After that, I tried to reboot the virtual machine, and the IP of the virtual machine is still the same.
Note
You don’t need the above steps if your virtual machine uses DHCP.
References
mattwalsh.dev
devpress.csdn.net
superuser.com

