How to Make a Virtual Machine’s IP Address on Hyper-V Static?
Throughout my experience using Hyper-V on Windows, if my virtual machine is using a static IP, then if my virtual machine or my laptop is restarted, my virtual machine’s IP will change automatically, even though I have created a static IP on my virtual machine. So I had to change the settings in a few places to keep up with the IP changes on my virtual machine, and it’s very tiring. However, I plan to make the virtual machine’s IP address on Hyper-V static.
Problem
How to make a virtual machine’s IP address on Hyper-V static?
Solution
When you create a virtual machine in Hyper-V, it will use the Default-Switch connection by default. This connection usually has a class B IP, like in the image below on my laptop:

If I create a virtual machine in Hyper-V, it will usually get an IP in class B as well, and it will change if there is a restart on my virtual machine or my Windows laptop. Therefore, I want to create a static IP in class C on my virtual machine in Hyper-V.
A. On Windows
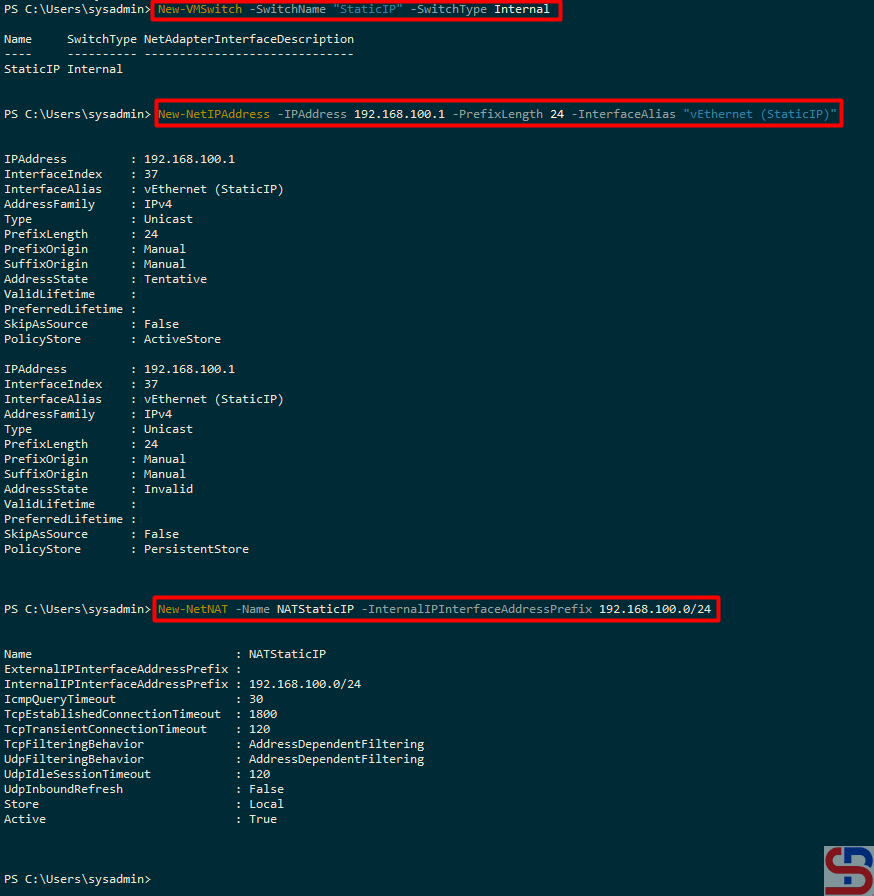
First, I have to create a new Virtual Switch, which I call StaticIP, and I write the following command in PowerShell:
New-VMSwitch -SwitchName "StaticIP" -SwitchType Internal
On the new Virtual Switch, I have to enter the IP address 192.168.100.0/24, so I type in PowerShell like the command below:
New-NetIPAddress -IPAddress 192.168.100.1 -PrefixLength 24 -InterfaceAlias "vEthernet (StaticIP)"
After that, I created an IP NAT for the new Virtual Switch by typing in PowerShell:
New-NetNAT -Name NATStaticIP -InternalIPInterfaceAddressPrefix 192.168.100.0/24
Then there should be a display as in the image below:
B. Check the Connections
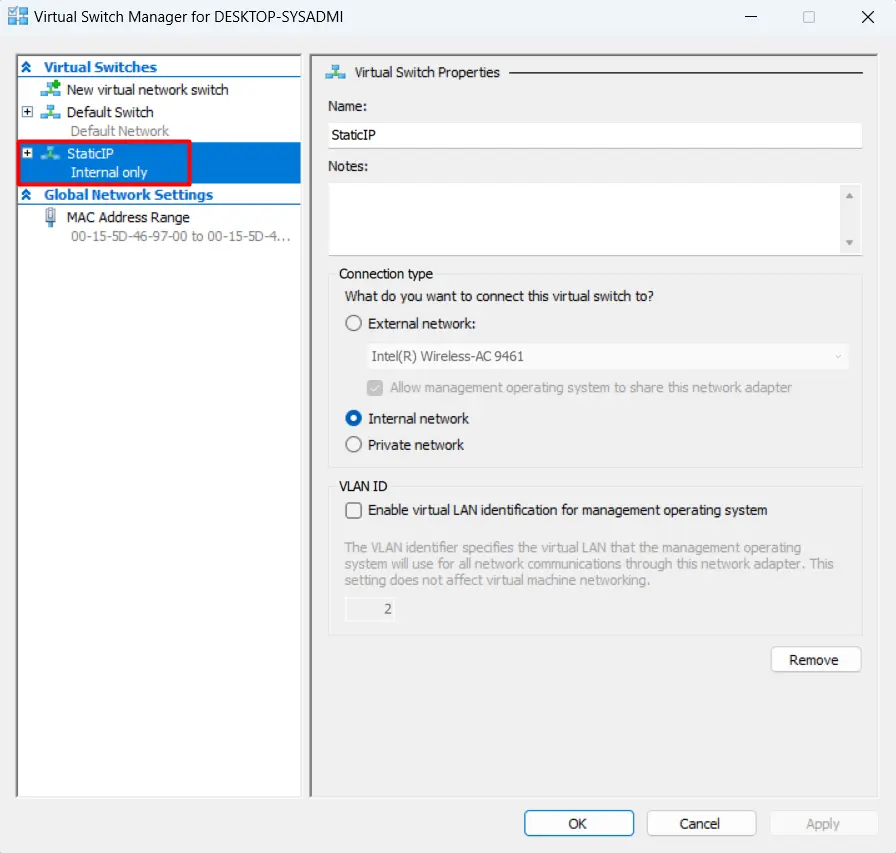
On Hyper-V Manager, there will be a new Virtual Switch Manager named StaticIP as shown below:
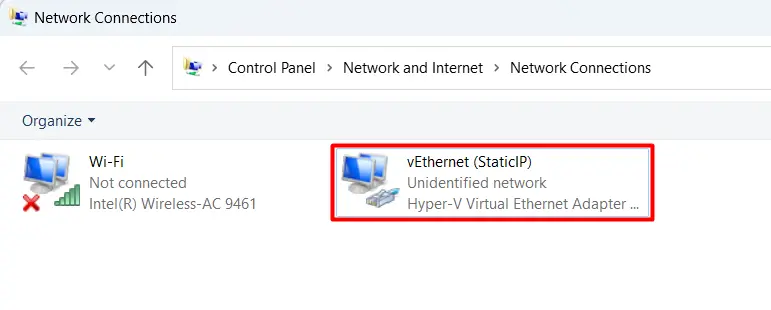
In the Network Connections section, there will be a new adapter as shown below:
And the IP of the new adapter is 192.168.100.1 as shown below:
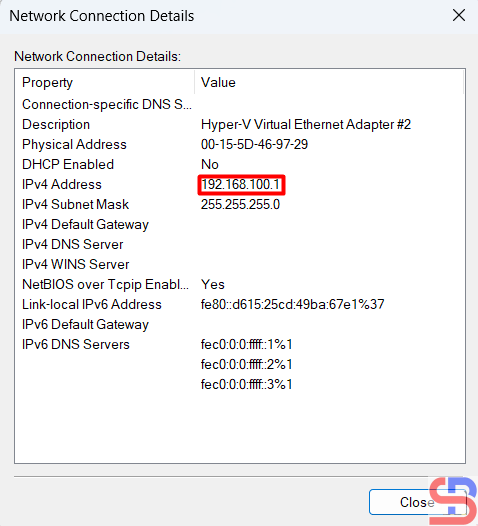
Or if you want a more complete IP for all adapters can be seen in the image below:

B. On a Virtual Machine
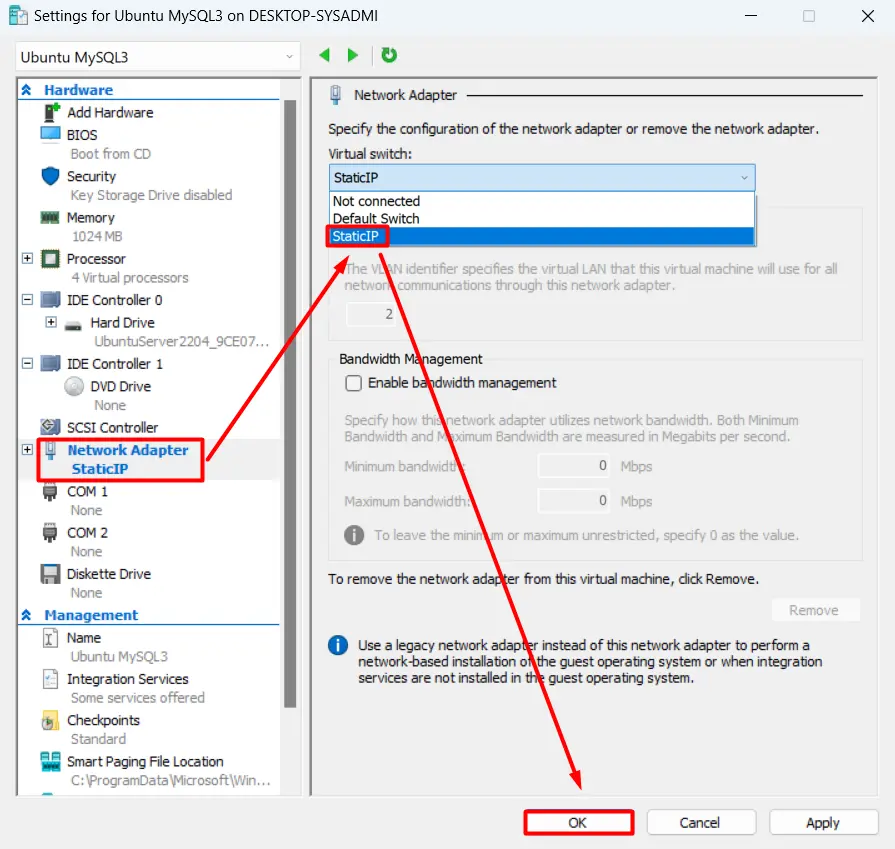
If you have previously created a virtual machine, change the virtual machine settings in the Virtual Switch section, select StaticIP as shown below, and then click the OK button:
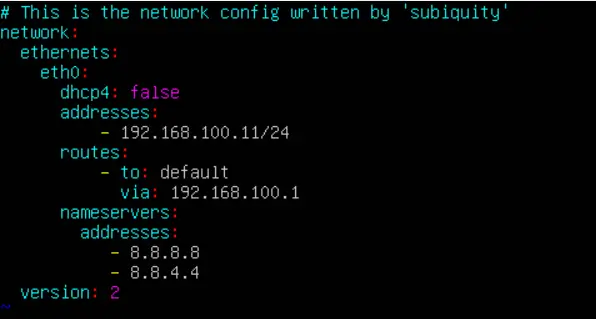
After that, log in to the virtual machine and change the IP. Because I am using Ubuntu, I changed it in the netplan section as shown below:
After that, I restarted the network and saw the changed IP as in the picture below:
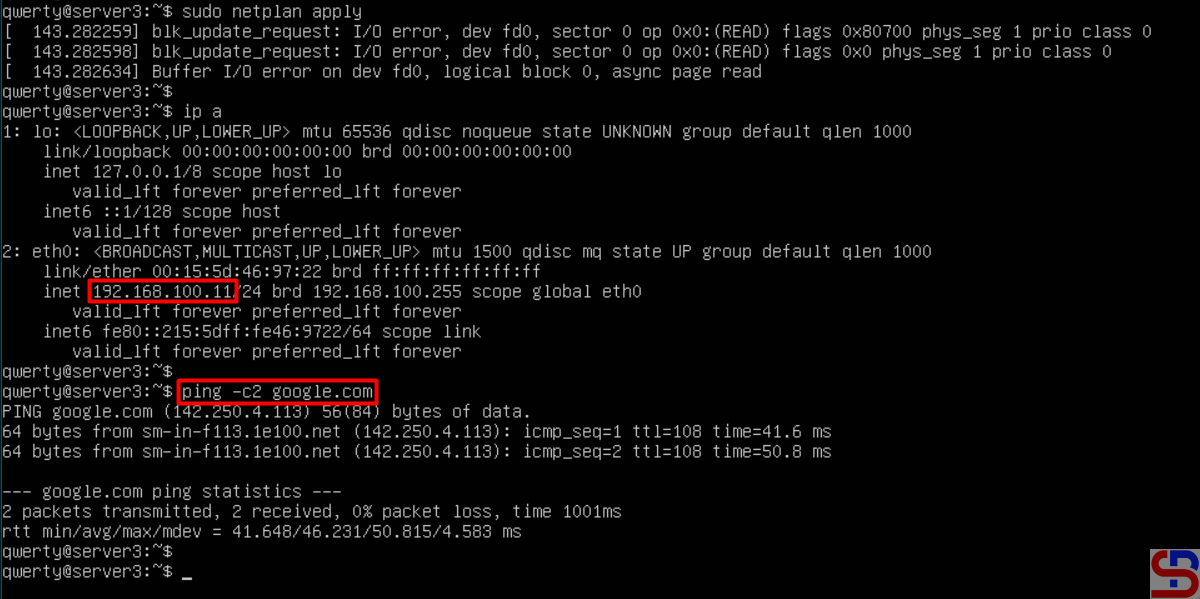
Based on the picture above, my virtual machine can connect to the internet, making it easier for me to install something from the internet on my virtual machine. After that, I tried to reboot the virtual machine, and the IP of the virtual machine is still the same.
Note
You don’t need the above steps if your virtual machine uses DHCP.