How to Configure UFW to be Port Forwarding?
The previous article explained how to configure the firewalld to become a port forwarding. This article will explain how to configure ufw applications in Ubuntu to become a port forwarding.
Problem
How to configure ufw to be port forwarding?
Solution
There are 2 methods of port forwarding: forward the connection of a port to one IP/device and forward the connection of a port to a different IP/device.
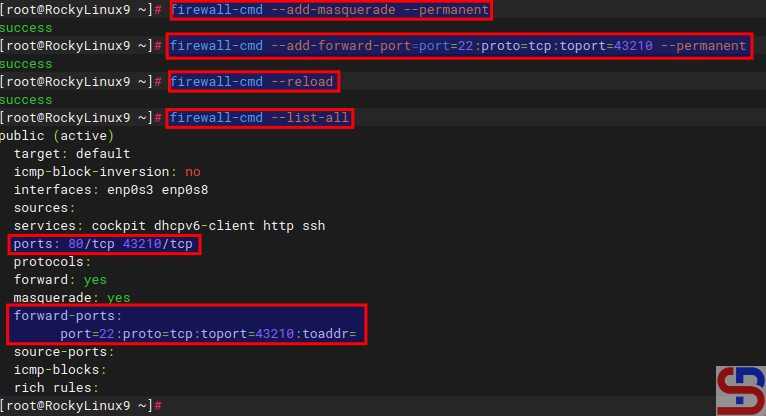
A. Forward to the same IP/device
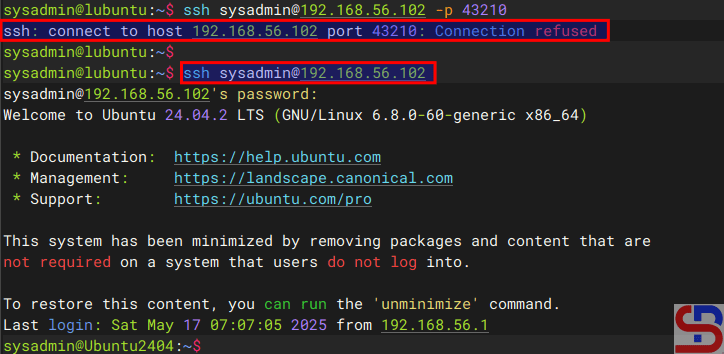
Suppose you have an Ubuntu server with IP address 192.168.56.102 and want to close port 22 but open port 43210 if someone wants to access the server via SSH. Change the SSH port like in this article, and you have to enable ufw in the server using the command below:
sudo ufw enable
Answer the question by pushing the y button. Now type the below commands to open port 22 and port 43210:
sudo ufw allow 43210/tcp
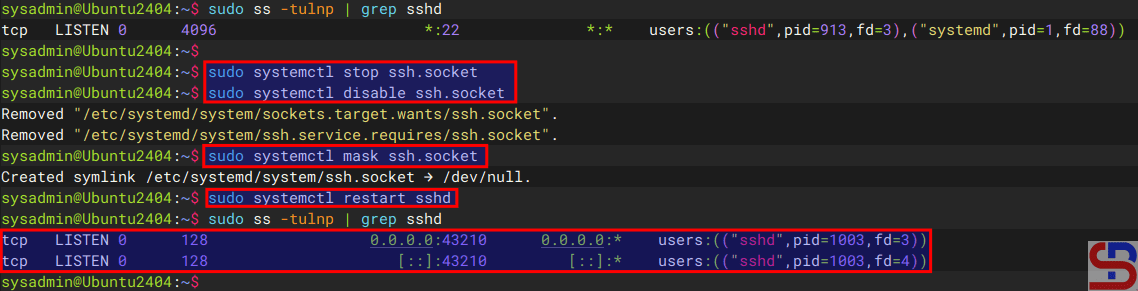
Check the SSH port using the below command and make sure the SSH port is pointed to the new port (port 43210) like in the below image:

If the port is still connected to port 22, you can go to this article to change the SSH port. Now, try to access the server using the command below:
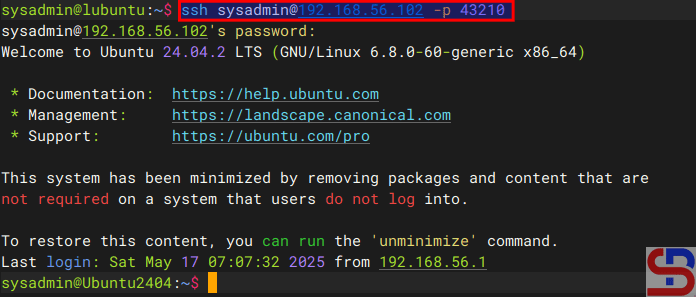
ssh sysadmin@192.168.56.102 -p 43210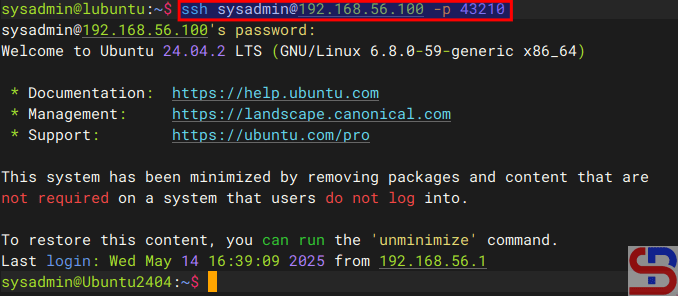
You should access the server like in the image above. Now, you want to implement the port forwarding in the ufw so the sysadmin doesn’t need to write -p 43210 anymore. So, you have to configure the before.rules file in the /etc/ufw folder. In short, before.rules typically contains rules that handle essential network traffic before ufw’s User-Defined Rules are applied. I think you have to backup the file before you configure the file using the below command:
sudo cp /etc/ufw/before.rules /etc/ufw/before.rules.ori
sudo vi /etc/ufw/before.rules
After that, copy the script below to the file before the *filter section:
# Port forwarding from port 22 to port 43210
*nat
:PREROUTING ACCEPT [0:0]
-A PREROUTING -p tcp --dport 22 -j REDIRECT --to-port 43210
COMMIT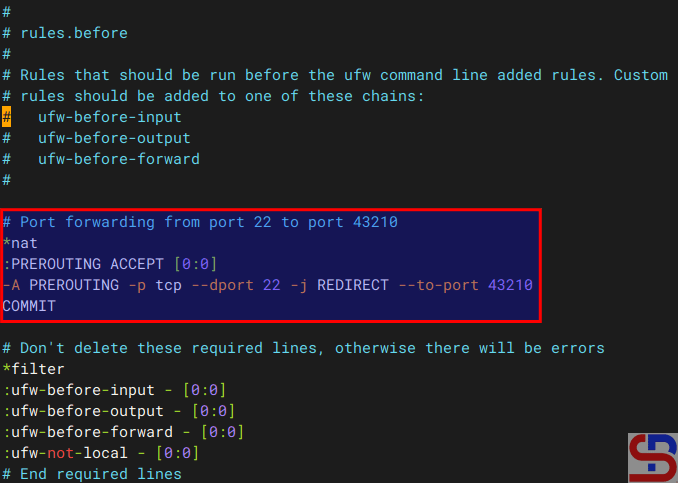
Restart ufw using the command below:
sudo ufw reload
Now, try to access using the command below:
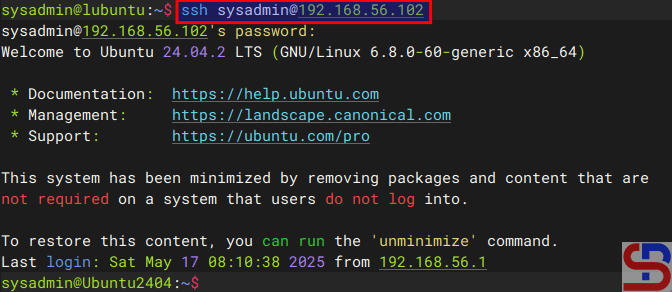
ssh sysadmin@192.168.56.102
You should access to the server without writing the port anymore like in the image below:
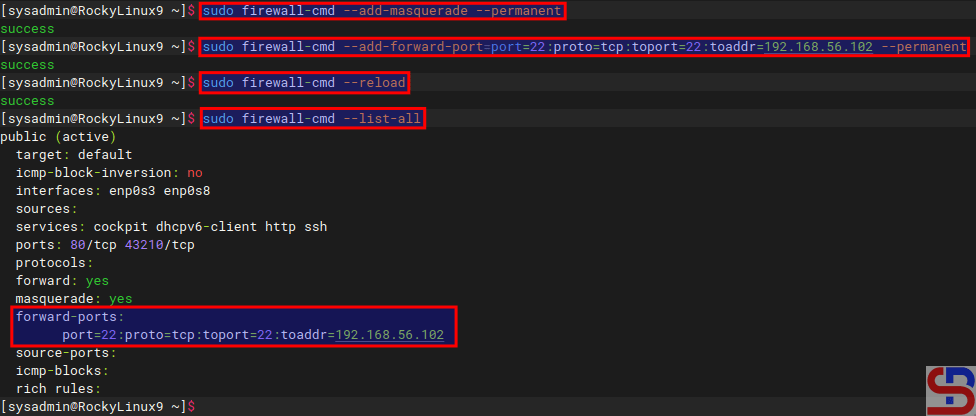
B. Forward to the different IP/device
Suppose you have a Ubuntu server with IP address 192.168.56.102 and port 22 is available. You would like users who access the server using SSH to forward to port 22 with IP address 192.168.56.2 using RockyLinux. So, these are the steps:
1. Configure ufw
Check your Ubuntu server to see whether UFW is running on the server using the command below:
sudo ufw status
If it still doesn’t run, use the command below to have ufw run on that server:
sudo ufw enable
Answer the question by pushing the y button. Then, open port 22 by using the command below:
sudo ufw allow 22/tcp
To run the forwarding port on UFW, you must configure the before.rules file in the /etc/ufw folder. In short, before.rules typically contains rules that handle essential network traffic before ufw’s User-Defined Rules are applied. I think you have to backup the file before you configure the file using the below command:
sudo cp /etc/ufw/before.rules /etc/ufw/before.rules.ori
sudo vi /etc/ufw/before.rules
After that, copy the script below to the file before the *filter section:
*nat
:PREROUTING ACCEPT [0:0]
:POSTROUTING ACCEPT [0:0]

# Forward traffic from 192.168.56.102:22 → 192.168.56.2:22
-A PREROUTING -d 192.168.56.102 -p tcp --dport 22 -j DNAT --to-destination 192.168.56.2:22

# Masquerade outgoing traffic (adjust eth0 to your outgoing interface)
-A POSTROUTING -s 192.168.56.0/24 -o eth0 -j MASQUERADE

COMMIT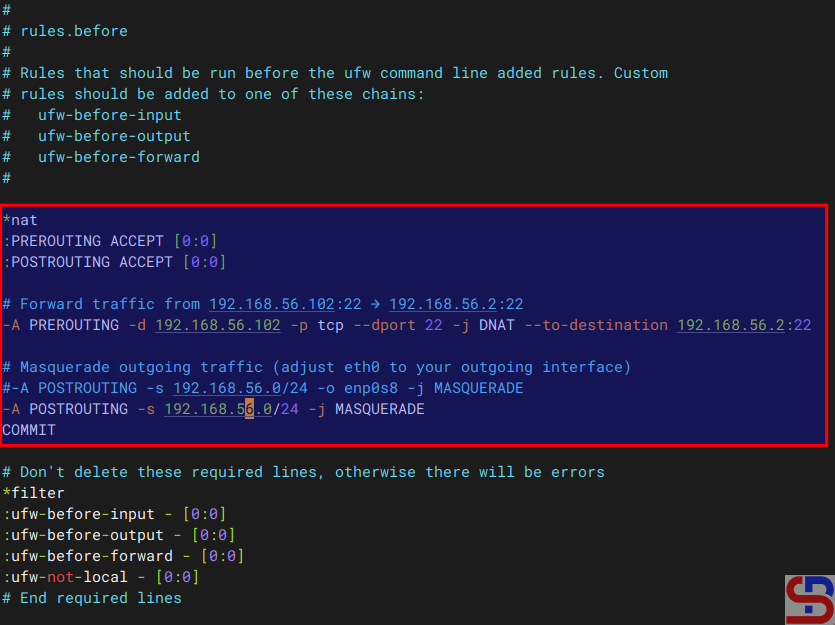
2. Enable IP Forwarding
Go to the /etc/default/ufw file and change the file from:
DEFAULT_FORWARD_POLICY="DROP"to
DEFAULT_FORWARD_POLICY="ACCEPT"
After that, go to the /etc/sysctl.conf file and uncomment or add in the file:
net.ipv4.ip_forward=1
And run the below commands:
sudo sysctl -p
sudo ufw reload
3. Test the result
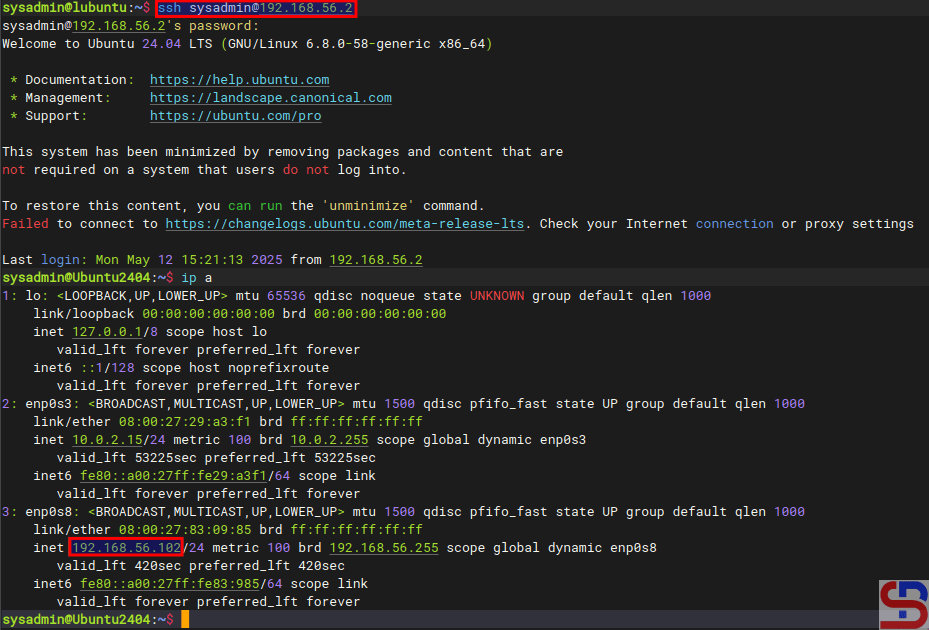
Now, try to access the Ubuntu server which has an IP 192.168.56.102 and you should be forwarded to the Rockylinux server that uses IP 192.168.56.2 like the below image:
ssh sysadmin@192.168.56.102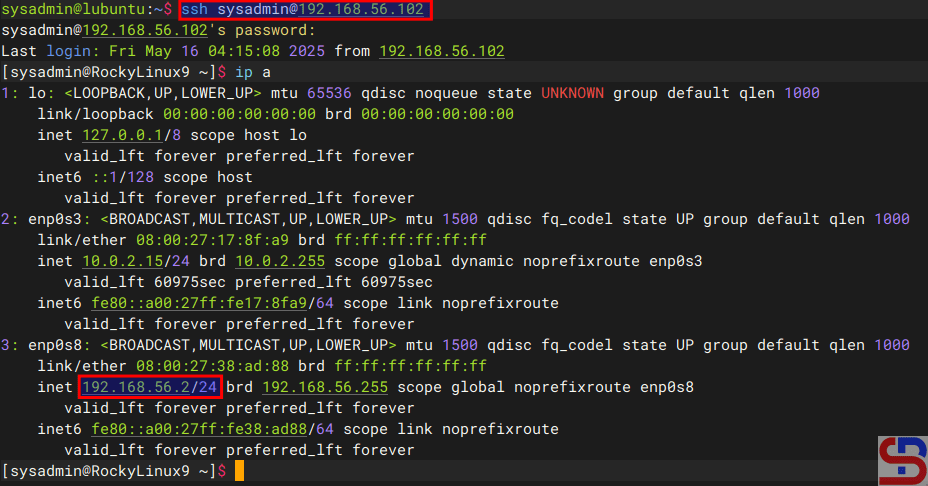
If you have a display like the image above, you have succeeded in making ufw as a forwarding port to a different IP/device.
Note
If you get an error like this:
WARNING: REMOTE HOST IDENTIFICATION HAS CHANGED!
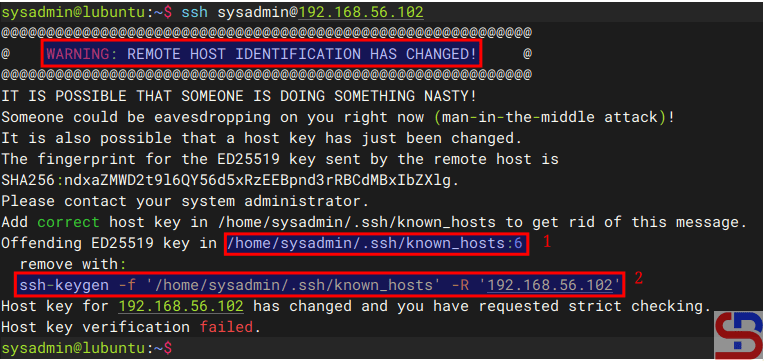
When you get this error, the system gives the clue to solve this error. Based on the picture above, you can go to the /home/sysadmin/.ssh/known_hosts file and delete line 6 or you run the command below:
ssh-keygen -f '/home/sysadmin/.ssh/known_hosts' -R '192.168.56.102'