The previous article explained how to make storage using volume in Docker. This article will explain how to make storage using Bind Mount.
Problem
How to storage mount using bind mount on Docker?
Solution
A bind mount is a method of hosting a directory or file that is directly mounted into a container. Since they aren’t isolated by Docker, both non-Docker processes on the host and container processes can modify the mounted files simultaneously. So, you can change the data from the host, and those changes will be reflected in the container. This method is useful for development environments where code must be updated and tested in real-time. There are 2 ways when use bind mount:
A. using -v option
This option (using -v or ‐-volume) uses three fields, separated by colon characters (:). The fields must be in the correct order, and the meaning of each field is not immediately obvious. To use this option, use the format below:
docker run -d –name container_name -v /path/folder/in/server:/path/folder/in/container[:opts] image_name:tag
To see more detailed information about mounting a container, use the format below:
docker inspect container_name -f "{{json .Mounts}}" | python3 -m json.tool
For example, you want to create a container with a nginx webserver that can be accessed with port 8080 with sources in folder /home/sysadmin/web and destination to the folder /usr/share/nginx/html on container, so first make a web folder in the server, and create a simple site then create a container using the command below:
mkdir /home/sysadmin/web
echo "<h1>Hello World</h1>" > web/index.html
docker run -d --name webapp1 -p 8080:80 -v /home/sysadmin/web:/usr/share/nginx/html nginx
docker inspect webapp1 -f "{{json .Mounts}}" | python3 -m json.tool
docker exec webapp1 cat /usr/share/nginx/html/index.html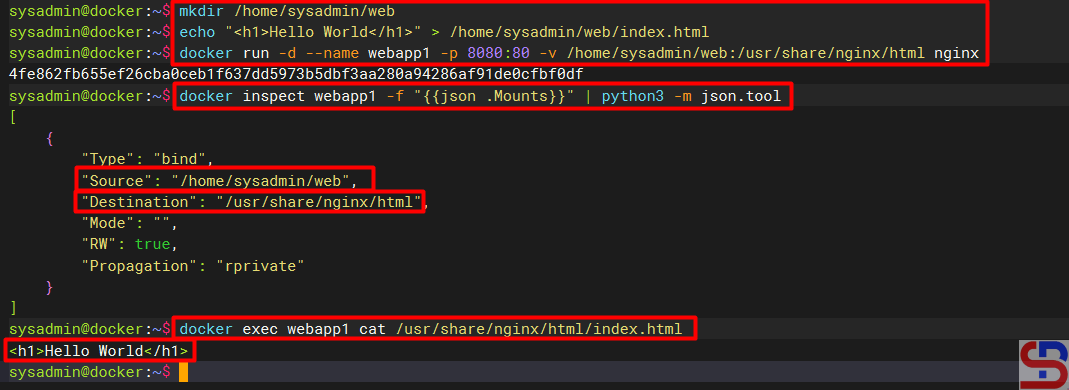
You can see from the image above that the index.html file in the container only displays the hello world sentence, so when you open the browser then the displays in the browser as shown below:
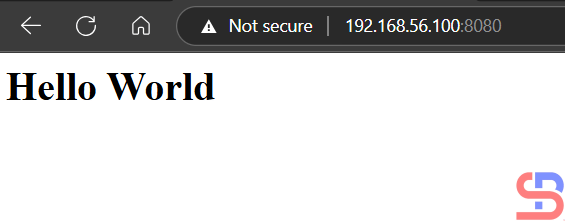
You can change the appearance of the website in the index.html file on the server or in the container. For example, you add the script below to the file on the server:
echo "<h2>Additional from server</h2>" >> web/index.html
Likewise, if you add the script below to the container:
docker exec webapp1 bash -c "echo Additional from container >> /usr/share/nginx/html/index.html"
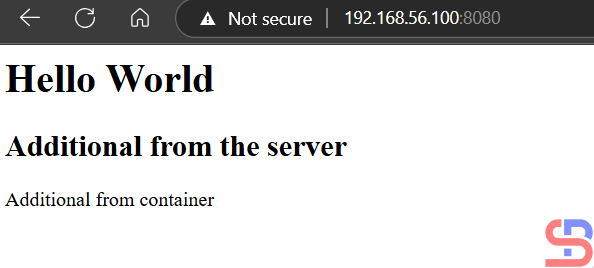
Both scripts will be included in the index.html file and will be displayed on the website as shown below:
B. Using ‐-mount Option
In general, these options are more explicit and verbose. This option consists of multiple key-value pairs, separated by commas, and each consisting of a <key>=<value> tuple. The biggest difference is that the -v syntax combines all the options in one field, while the –mount syntax separates them. The –mount syntax is more verbose than -v or –volume, but the order of the keys is not significant, and it is easier to understand. To use this option, use the format below:
docker run -d --name container_name --mount type=type_mount,source=/path/folder/in/server,destination=/path/folder/in/container[,<key>=<value>...] image_name:tag
For example, you want to create a container with an Apache web server that can be accessed on port 8081 with sources in the folder /home/sysadmin/mount and destination to the folder /usr/local/apache2/htdocs on the container, so first make the mount folder in the server, then make the container using the command below:
mkdir /home/sysadmin/mount
echo "<h1>Learn --mount option</h1>" > mount/index.html
docker run -d --name webapp2 -p 8081:80 --mount type=bind,source=/home/sysadmin/mount,destination=/usr/local/apache2/htdocs httpd
docker inspect webapp2 -f "{{json .Mounts}}" | python3 -m json.tool
docker exec webapp2 cat /usr/local/apache2/htdocs/index.html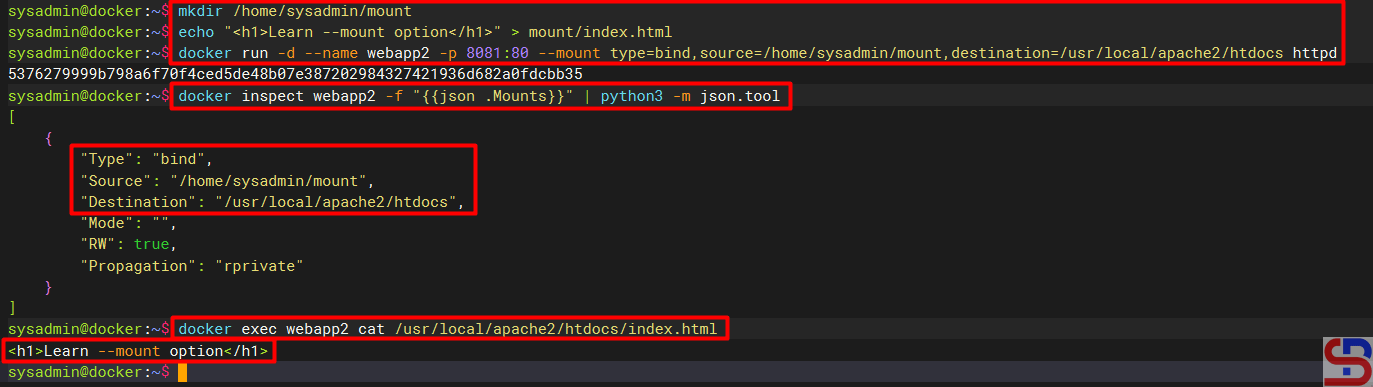
Like using the -v option, you can change the appearance of the website in the index.html file on the server or in the container. For example, you add the script below to the file on the server:
echo "<h2>Additional from server</h2>" >> mount/index.html
Likewise, if you add the script below to the container:
docker exec webapp2 bash -c "echo Additional from container >> /usr/local/apache2/htdocs/index.html"
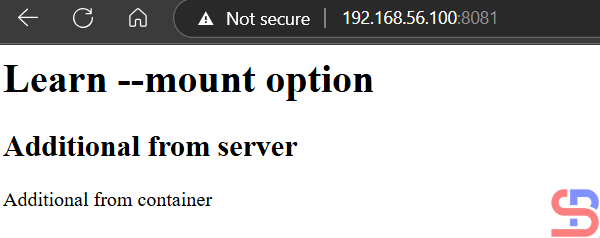
Both scripts will be included in the index.html file and will be displayed on the website as shown below:
Note
The only difference between the two options above is how the commands are executed; otherwise, the results would be identical.
References
youtube.dimas-maryanto.com
youtube.com
docs.docker.com
docker.com
linkedin.com

