How to Protect phpMyAdmin Using Nginx?

The previous article explained how to install phpMyAdmin with the nginx web server. This article will explain how to protect phpMyAdmin from unauthorized users using nginx.


Problem

How to protect phpMyAdmin using nginx?


Solution

There are several methods to protect phpMyAdmin using nginx:

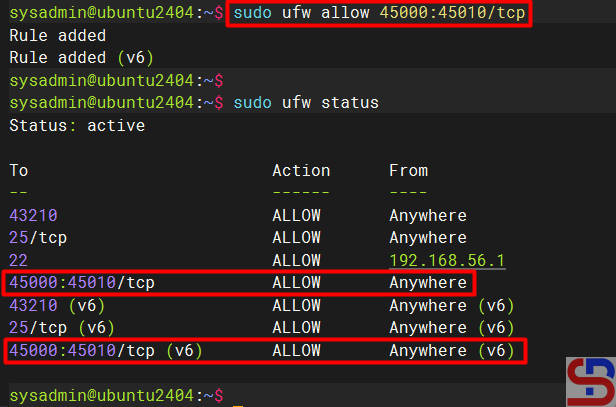
1. Allowing certain IPs

The phpMyAdmin application can only be accessed by users who have certain IP addresses. For example, you want the IP localhost, and only 192.168.56.1 to be able to access phpMyAdmin. Then add the script below to the /etc/nginx/sites-available/default file in the location /phpmyadmin section:

allow 127.0.0.1;
allow 192.168.56.1;
deny all;


For more details, take a look at the image below:

Allowing certain IPS


After that, use the command below to reload nginx:

sudo nginx -t
sudo systemctl reload nginx


If any user who uses an IP other than the localhost and 192.168.56.1 wants to access phpMyAdmin, then that user will not be able to access phpMyAdmin, as shown in the image below:

Forbidden access


2. Add a password

To make it safer, phpMyAdmin should be given additional HTTP Auth so that users who want to access the application must enter a password. Use the command below to install HTTP auth:

sudo apt install apache2-utils
sudo htpasswd -c /etc/nginx/.phpmyadmin admin


Enter the password that you want, and then in the /etc/nginx/sites-available/default file, add the script below:

auth_basic 'Restricted';
auth_basic_user_file /etc/nginx/.phpmyadmin;


So the default file will look like the image below:

Adding HTTP Auth in Nginx


After that, use the command below to reload nginx:

sudo nginx -t
sudo systemctl reload nginx


Open the browser, and when you access phpMyAdmin, it should be there should be a display like below:

Enter username and password when accessing phpMyAdmin


Enter the username: admin and the password you created previously. If there are no errors, you can access phpMyAdmin.


3. Change the URL

By default, if you want to access phpMyAdmin, then you type the command below:

http://ip_server/phpmyadmin


However, for security reasons, it is best to replace the word phpMyAdmin with another word, for example, pma, so that the site address changes to:

http://ip_server/pma


Therefore, in the default file, change the file by deleting the /phpmyadmin section with the script below:

location /pma {
        alias /usr/share/phpmyadmin/;
        index index.php;

        allow 127.0.0.1;
        allow 192.168.56.1;
        deny all;

        auth_basic "Restricted";
        auth_basic_user_file /etc/nginx/.phpmyadmin;

        location ~ \.php$ {
        include snippets/fastcgi-php.conf;
        fastcgi_pass unix:/run/php/php8.3-fpm.sock;
        fastcgi_param SCRIPT_FILENAME $request_filename;
        }

        location ~* \.(css|js|jpg|jpeg|gif|png|ico|html|xml|txt)$ {
        expires 30d;
        access_log off;
        }
    }


so that the default file changes to look like the image below:

Change the URL in Nginx


Use the command below to reload nginx:

sudo nginx -t
sudo systemctl reload nginx


Open http://ip_server/pma in your browser, then you should be able to access phpMyAdmin as in the image below:

Change the URL


Note

There is one more method so that your phpMyAdmin application can be secure, namely, using SSL. You can use a Let’s Encrypt SSL certificate for your phpMyAdmin site because the certificate is free. However, if you want the phpmyadmin application not to be accessed by the public, I think,  then there is no need to use SSL.


References

digitalocean.com
serverfault.com
httpd.apache.org


How to Encrypt a File Using the Vim Application?

If you have important source code and are worried that someone is changing or duplicating it, you can protect it by encrypting the file so that other people cannot read the source code unless they can enter the appropriate password. There are several ways to encrypt a file, but in this article will use the vim application.


Problem

How to encrypt a file using the Vim application?


Solution

A. The Vim application

Vim or vi improved is an enhanced, improved, and extended version of the Vi text editor. To see if the application is already installed or not, use the command below:

vim --version


If your Linux device does not have a Vim application, you can install it using the following commands:

RockyLinux/AlmaLinux/CentOS

yum install vim


Ubuntu/Debian

sudo apt update
sudo apt install vim


OpenSUSE

sudo zypper install vim


The Vim application has a feature to encrypt a file so that users who want to access the file must enter a password, and the algorithm used by the Vim application to encrypt a file is Blowfish. Suppose you have a file called test.txt, the contents of which are as below:

No  Name        Address
1   Richard     Apt. 344 86094 Swaniawski Drive, East Suzetteshire, MT 51323-2013
2   Alex        4522 Rosenbaum Island, Lake Suzan, IL 68193
3   Bryan       Apt. 907 703 Douglas Run, West Brainburgh, MT 70080-8990


B. Encrypt the file

There are 2 methods for encrypting files using the Vim application:

1. Before accessing the file

If you want to encrypt a file, then use the format below before you access the file:

vim -x filename


For example, if your file name is test.txt, then use the command below before you access the file:

vim -x test.txt


There will be writing as below:

Enter the password


Enter the password you want, press the Enter button, then there will be writing as below:

Enter the password again


You will be able to access the test.txt file. After that, save and exit the file, and thus you have successfully encrypted the file. Now, try to display the file, and the file should be encrypted as shown below:

Encrypt the file using the first method


If you or other users want to access the file, you must enter the password as shown below:

When accessing the encrypted file using the Vim application


If your password is suitable, the file can be displayed, but if the password is not appropriate, the file remains in its the condition in the encrypt.

2. When accessing files

When you are accessing the file and want the file to be encrypted, then in the command mode (mode in Vim after you press the Esc button), Type :X, press the Enter button, it will be written as below:

encrypt a file using the Vim application
Create the encrypt using the second method


Press the Enter key after entering the desired password, and the following text will appear:

encrypt a file using the Vim application
Enter the password again


After that, save and exit the file, and thus you have successfully encrypted the file.

C. Decrypt the file

If you want the file to be decrypted or no longer need to use a password to access it, then open the file by entering the password and then write  :X in the command mode, and press the Enter button 2x when you are asked to enter the password. After that, save and exit the file, and the file should be directly opened without having to enter the password again, as shown below:

Decrypt the file


Note

You must always remember the password that you use to encrypt in Vim because if you forget then as far as I know, you will not be able to decrypt the file.


References

askubuntu.com
geeksforgeeks.org
networkworld.com
ii.com
superuser.com


How to Change SSH Port?

If you access a device such as a server using an SSH connection, you are using port 22 by default. However, port 22 is often the target of security attacks, so it is recommended that you change the SSH port.


Problem

How to change SSH Port?


Solution

To change the SSH port on a Linux server, go to the /etc/ssh/sshd.config file, look for the line containing Port 22 and set it to the number you want to change. For example,  you want to change the SSH port to port 43210, so change the line as in the script below from:

#Port 22

to

Port 43210


After that, restart the SSH service using the command below:

Ubuntu/Debian

systemctl restart ssh


RockyLinux/AlmaLinux/CentOS & OpenSUSE

systemctl restart sshd


After that, test by accessing SSH using port 43210. If you use Putty, then change port 22 to 43210 as in the image below:

change SSH Port
Change the port in Putty


If you can’t access the Linux server, make sure you have opened the firewall on the server (you can open this page if you use RockyLinux and OpenSUSE, but if you use Ubuntu, you can read it on this page). If you want to access it via a Linux server, then use the format below:

ssh username@your_server_ip -p port_number

Then the format above can be the command below:

ssh sysadmin@192.168.56.12 -p 43210

change SSH Port
Access via SSH using a new SSH port


WARNING
If you run a firewall on your remote server, you must open the port first. If you want to get an explanation of how to open the port, go to this page if you use firewalld or go to this page if you use ufw.


Note

Please note that the port number is from 0-65536, however, these ports are divided into 3 classifications:

  • Port 0-1023 => Well-Known ports, you can not use these ports.
  • Port 1024-49151 => Registered ports, these is a registered ports assigned by IANA (Internet Assigned Numbers Authority), you can or can not use these ports.
  • Port 49152-65535 => Dynamic or Private ports, you can use these ports.


References

jay75chauhan.medium.com
ionos.com
gcore.com
en.wikipedia.org
arubanetworks.com


How to Open and Close a Port in Ubuntu?

The previous article explained how to open and close ports in RockyLinux/AlmaLinux/CentOS. This article will explain how to open and close a port in Ubuntu.


Problem

How to open and close a port in Ubuntu?


Solution

A. Check the firewall

By default, Ubuntu and Debian use the UFW or Uncomplicated Firewall application as the default firewall, and it is installed automatically when you install Ubuntu/Debian. If the firewall is not installed on your Ubuntu/Debian distro, use the command below:

sudo apt install ufw


To see whether ufw is running or not, use the command below:

sudo ufw status

Check status ufw


From the image above, you can see that the application is not yet active. To enable it, type the command below:

sudo ufw enable

Enable ufw


If you want to see the complete current status of the firewall, use the command below:

sudo ufw status verbose

Display the complete current status of the firewall


By default, the firewall only opens the OpenSSH service, which you can view by using the command below:

sudo ufw app list

Display the service that is open in the firewall


B. Open the port

To open a port, for example, port 43210, use the command below:

sudo ufw allow 43210

Open the port


WARNING
If you open the port using the command above, it means you will open the port for both TCP and UDP.


To open a port range, for example, from port numbers 45000 to 45010 with the TCP protocol, use the command below:

sudo ufw allow 45000:45010/tcp

Open the range ports

C. Open the service

You can see from the image above that port 43210 has been opened on your Ubuntu server. You can also use the service name when opening a port. For example, if you want to open the SMTP service on your Ubuntu server, then use the command below:

sudo ufw allow smtp

Open the SMTP service


D. Open the port from a certain IP

If you want to open a port from a certain IP, for example, you  only allow IP 192.168.56.1 to access port 22 on this server, then use the command below:

sudo ufw allow from 192.168.56.1 to any port 22

Open and Close a port in Ubuntu
Allow the IP to a certain port


To allow the 192.168.56.0 subnet to the SMTP service, use the command below:

sudo ufw allow from 192.168.56.0/24 to any port 25

Open and Close a port in Ubuntu
Allow the subnet to a certain port


E. Close the port

To close port 25, use the command below:

sudo ufw deny 25

Open and Close a port in Ubuntu
Close the port


F. Delete the port

You can also close a port and delete the port that has been opened, for example, port 43210, using the syntax below:

sudo ufw delete number

Open and Close a port in Ubuntu
Close and delete the port


WARNING
You don’t need to run sudo ufw reload after each rule change using ufw commands (such as ufw allow or ufw deny). However, you will need to run sudo ufw reload if you are editing the ufw configuration file manually (such as /etc/ufw/before.rules or /etc/ufw/after.rules), or if you want to make sure all the latest rules and settings are loaded.


Note

You can remove all the rules in ufw by using the command below:

sudo ufw reset


After that, enable the ufw by using the command below:

sudo ufw enable


Reset ufw


By default, if you open a port, it will automatically open in IPv4 and IPv6, and likewise, if you close the port. To see the UFW settings, open the /etc/default/ufw file.

Open and Close a port in Ubuntu
Configuration of ufw


References

cyberciti.biz
phoenixnap.com
digitalocean.com
help.ubuntu.com
askubuntu.com


How to Open And Close a Port on RockyLinux Server?

By default, the RockyLinux/AlmaLinux/CentOS distro provides two firewalls, iptables and firewalld. This article will explain how to open and close a port using Firewalld on the distro. If you have opened and closed a port using Firewalld, you don’t need to open and close a port in iptables.


Problem

How to open and close a port on the RockyLinux server?


Solution

A. Check the Firewalld status

By default, the Firewalld package is installed automatically using the command:

systemctl status firewalld

Check the status of Firewalld


From the picture above, you can see that the firewall on the server is already running. If the Firewalld is not already running, use the command below:

systemctl enable --now firewalld


But if on your server there is no firewall package, you can install it using the command below:

yum install -y firewalld


B. Check the zones

Firewalld uses zones and services, compared to iptables, which use chains and rules. Zones are a collection of rules that have been set for what network connections should be permitted based on the level of confidence in the network connected to the system. We can determine the name of the network interface and the network source into zones. To see the zones in firewalld and which zone is the default, use the command below:

firewall-cmd --get-zones
firewall-cmd --get-default-zone

Show all zones in Firewalld


From the picture above, there are 9 zones, and the explanation can be seen in the picture below, which is sorted from the most trusted

The zones in Firewalld (Image credit for linuxteck.com)


To view all settings for all zones, use the following command:

firewall-cmd --list-all-zones

View all the settings in Firewalld


But, if you want to view all settings in a specific zone, for example, a public zone, use the following command:

firewall-cmd --zone=public --list-ports


C. Open the Port

Now, if you want to open port 43210 with TCP protocol, use the command below:

firewall-cmd --add-port=43210/tcp --permanent
firewall-cmd --reload

Open the port


Use the command below to see the ports that have been opened:

firewall-cmd --list-ports

List all opened ports


D. Open the port from a certain IP

If you want to open a port from a certain IP, for example, you  only allow IP 192.168.56.100 to access port 22 on this server, then use the command below:

firewall-cmd --zone=public --add-rich-rule 'rule family=ipv4 source address=192.168.56.100 port port=22 protocol=tcp accept'
firewall-cmd --reload
firewall-cmd --list-rich-rules

Allow the IP to a certain port


If you want to reject a host with IP 192.168.56.100 to access port 22, use the command below:

sudo firewall-cmd --permanent --add-rich-rule='rule family="ipv4" source address="192.168.56.100" port port="22" protocol="tcp" reject'
firewall-cmd --reload
firewall-cmd --list-rich-rules

Block the IP to a certain port


E. Close the port from a certain IP

If you want to close a port from a certain IP, for example, you  block a host with  IP 192.168.56.100 from accessing port 22 on this server, then use the command below:

sudo firewall-cmd --permanent --remove-rich-rule='rule family="ipv4" source address="192.168.56.100" port port="22" protocol="tcp" accept'
firewall-cmd --reload
firewall-cmd --list-rich-rules

Remove the IP to a certain port


INFO
In short, if you want to delete the rich rule, then change the option –add-rich-rule to –remove-rich-rule.


F. Close the port

Use the command below to close the newly opened port 43210:

firewall-cmd --remove-port=43210/tcp --permanent
firewall-cmd --reload

open and close a port on the RockyLinux
Close the port in Firewalld


G. Open the service

Apart from using ports, Firewalld can also open and close services on the server. To see the services that have been opened, type the command below:

firewall-cmd --list-services

open and close a port on the RockyLinux
List all opened services


You can see in the picture above that the distro only opens 3 services. If you want to open the SMTP service, use the command below:

firewall-cmd --add-service=smtp --permanent
firewall-cmd --reload

open and close a port on the RockyLinux
Add the service to the firewall


H. Close the service

To delete the SMTP service in Firewalld, use the command below:

firewall-cmd --remove-service=smtp --permanent 
firewall-cmd --reload

open and close a port on the RockyLinux
Close the service in Firewalld


Note

If you use the OpenSUSE distro, you can use the above commands to open and close a port, like in the image below:

open and close a port on the RockyLinux
The Firewalld commands in OpenSUSE


References


How to Allow Access to the Linux Server Only Using SSH Key Authentication?

By default, the Linux server will ask to enter a username and a password if someone accesses the server via SSH. However, the previous article explained that you can access the Linux server using the passwordless SSH login method. Now I want my Linux servers to only allow access via SSH key authentication or SSH passwordless login.


Problem

How to allow access to the Linux server only using SSH key authentication?


Solution

You can make the security of your Linux server stronger by restricting access to the Linux server using SSH key authentication. It means the remote server can only being able to accessed the server for those who already use SSH passwordless login, so that if another user wants to access the server, it will be rejected. To allow access to the Linux server only using SSH key authentication, change the configuration in the /etc/ssh/sshd_config file by looking for the line containing PasswordAuthentication and setting it to no, as in the script below:

PasswordAuthentication no


After that, restart the SSH service using the command below:

Ubuntu/Debian

systemctl restart ssh


RockyLinux/AlmaLinux/CentOS

systemctl restart sshd


You should not be able to access the server when you try to connect to it using SSH. This means your SSH configuration is correct. Below is an example of an error that occurs when accessing via Putty:

allow access to the Linux server only using SSH key authentication
Can not access the server from Putty


For example, in the previous article, the sysadmin user on the Ubuntu server could access the RockyLinux server because he had used SSH Passwordless Login as in the image below:

Can access the server from the Ubuntu server


I can not access the RockyLinux server if I access it via the OpenSUSE server, as in the image:

Can not access the server from the OpenSUSE server


If you want to add another user to be able to access the server, you have to copy the .ssh/id_rsa.pub file and put it into the remote server in the .ssh/authorized_keys file. You can use the help of a user who can access the server to put the file. Look at the image below, where I have included the id_rsa.pub file for the sysadmin user on the OpenSUSE server on the RockyLinux server:

allow access to the Linux server only using SSH key authentication
Put the id_rsa.pub into the remote server


I tried to connect again to the RockyLinux server using the sysadmin user on the OpenSUSE server. I can access the server as shown in the image below:

allow access to the Linux server only using SSH key authentication
Can access the server from the OpenSUSE server

Note

Make sure the remote server already contains authorized_keys files from other servers so that it doesn’t make things difficult for you in the future.


References

strongdm.com
tecmint.com
linuxize.com