NFS or Network File Sharing is a protocol that allows you to share directories and files with other Linux clients over a network. Similar to locally created folders, an NFS file share is accessible when mounted on a client computer. When you have limited disk space and need to share public data between client machines, NFS is especially helpful.
Problem
How to install and configure NFS on Linux?
Solution
This article will explain how to install and configure NFS on 3 Linux distros: Rockylinux, Ubuntu, and OpenSuse and this article should work in each of their derivatives of the three distros.
A. On the server
Following are the steps to install and configure NFS:
1. Install NFS
I install NFS in the server with IP 192.168.56.2, and to install the NFS application on the Linux server, use the command below:
RockyLinux
sudo dnf install -y nfs-utils
Ubuntu
sudo apt update -y
sudo apt-get install -y nfs-kernel-server
OpenSUSE
sudo zypper install -y nfs-kernel-server nfs-utils
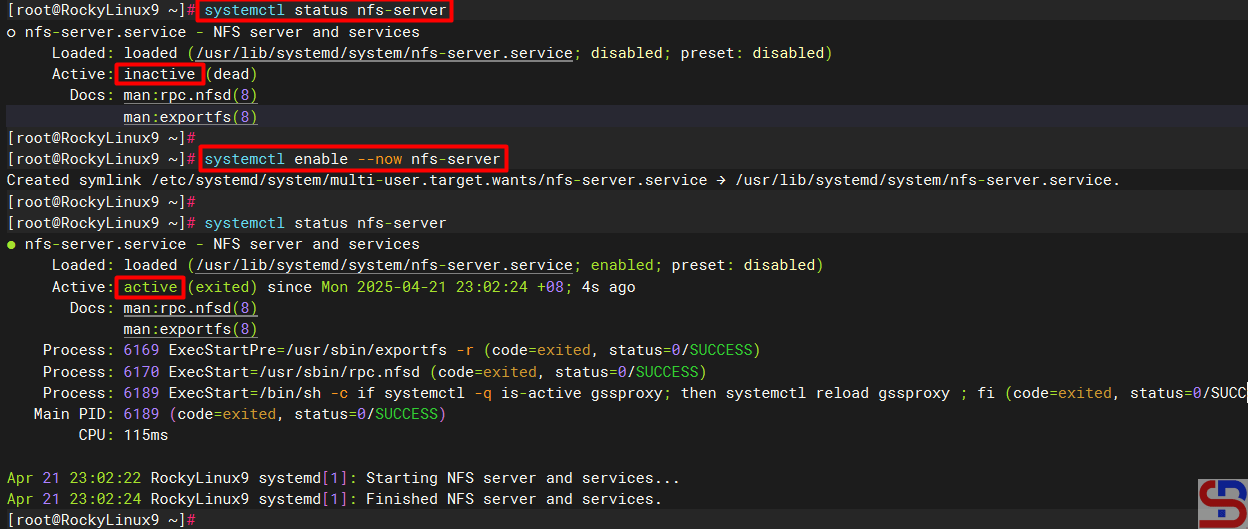
2. Check NFS status
Type the command below to check the NFS status:
systemctl status nfs-server
If you see the NFS status is still not on, use the command below to turn on the NFS service:
sudo systemctl enable --now nfs-server
Sometimes you have to check the nfs-mountd service using the command below:
sudo systemctl status nfs-mountd
If the service is not on the server, then use the command below to turn on the service:
sudo systemctl start nfs-mountd
3. Check the rpcbind status
Make sure that the rpcbind service is actively used by NFS for the mapping port. Use the command below to check the status of the service:
sudo systemctl status rpcbind
If the service is not active, use the command below to start the service:
sudo systemctl enable -now rpcbind
4. Check NFS and Portmap
To see if NFS and portmap (Portmap is a server that converts RPC program numbers into DARPA protocol port numbers. It must be running to make RPC calls) are running on the server, use the command below:
sudo rpcinfo -p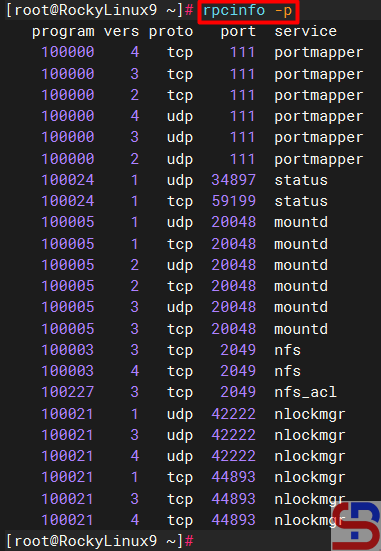
5. Configure firewall
If you still turn on the firewall on Linux, use the command below to open the NFS port (Port NFS is TCP Port 2049):
RockyLinux & OpenSUSE
firewall-cmd --add-service nfs --permanent
firewall-cmd --reload
firewall-cmd --list-services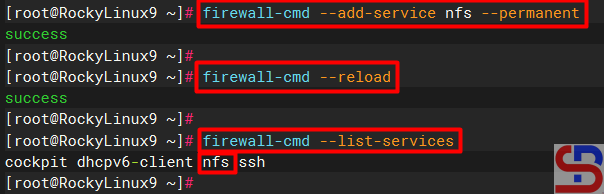
Ubuntu
sudo ufw allow nfs
sudo ufw status verbose
Use the command below to open the rpcbind port (rpcbind port is TCP Port 111):
Rockylinux & OpenSUSE
firewall-cmd --add-port=111/tcp --permanent
firewall-cmd --reload
firewall-cmd --list-ports
Ubuntu
sudo ufw allow 111
sudo ufw status verbose
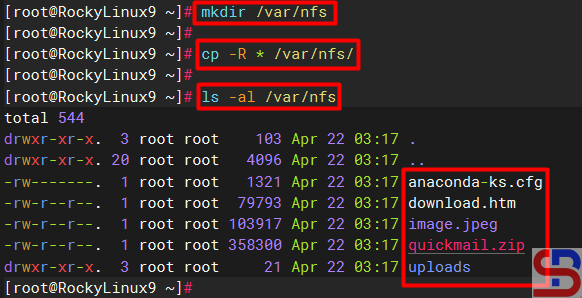
6. Make a folder sharing
Create a folder to collect NFS files and folders and I make it in the folder /var/nfs using the command below:
mkdir /var/nfs
After that, copy the file(s) and folder(s) that you want to share into the folder as shown below:
7. Define an Export File
To grant access to NFS clients, you need to define an export file and it is typically located at /etc/exports. Use the format below to define an export file:
/folder/path accessible-host-ip-address(options)
The options you can use can be seen in the image below:
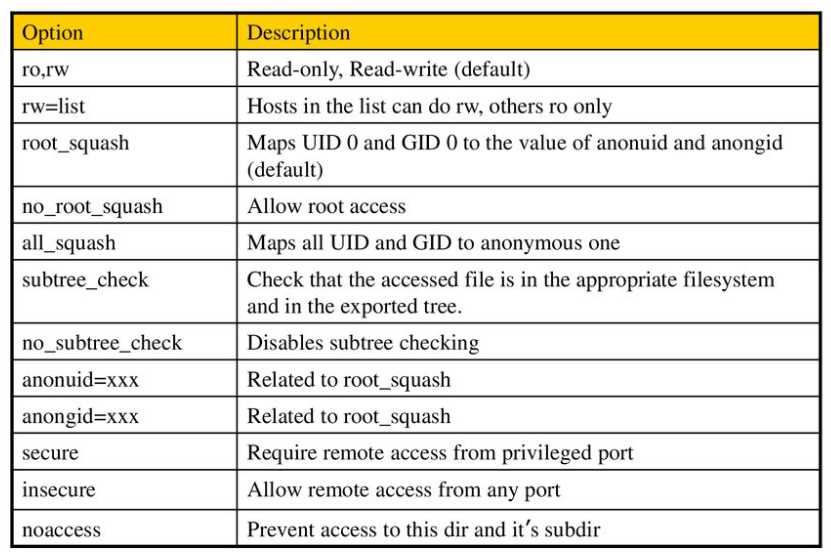
You can use more than one option like (rw,sync,no_subtree_check). By default, NFS uses the ro option where the client can only read the file or folder in the folder sharing. In this article, I only want the folder sharing can only be accessed by users who only use IP 192.168.56.0/24 and the folder can be changed by the users, then use the command below to enter the script into the exports file:
sudo echo "/var/nfs 192.168.56.0/24(rw)" > /etc/exports
Then change the permissions so that the files and folders in the folder sharing can be changed using the command below:
RockyLinux & OpenSUSE
chown -R nobody:nobody /var/nfs
sudo chmod -R 775 /var/nfs
Ubuntu
chown -R nobody:nogroup /var/nfs
sudo chmod -R 775 /var/nfs
8. Export exports file
Use the command below to make the folder sharing available to the clients:
sudo exportfs -r
Use the command below to view the exports file:
showmount -e
To see which hosts access file sharing, use the command below:
sudo netstat -an | grep 2049
B. On the client
Following are the steps to install and configure NFS:
1. Install NFS client
Use the command below to install the NFS client:
RockyLinux
sudo dnf install -y nfs-utils
Ubuntu
sudo apt-get install -y nfs-common
OpenSUSE
zypper install -y nfs-client*
2. Check the ports in the NFS server
Use the command below to check whether the client can access the ports (port 2049 and 111) in the NFS server or not (the IP server NFS is 192.168.56.2):
rpcinfo -p 192.168.56.2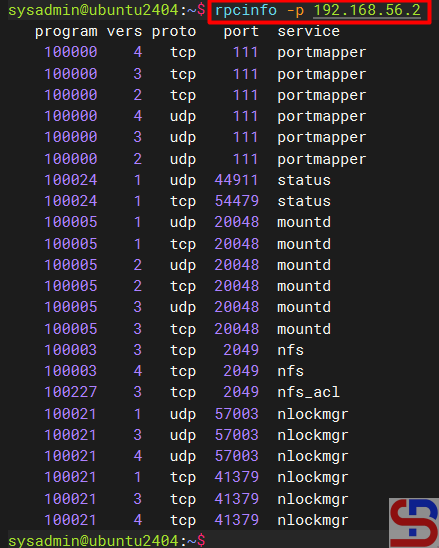
2. Make and mount a folder
Make the folder where we want to mount the NFS shares from the server, for example, I made a folder in /tmp/nfs:
mkdir /tmp/nfs
After that the mount folder with the NFS server using the format below:
sudo mount -t nfs 192.168.56.2:/var/nfs /tmp/nfs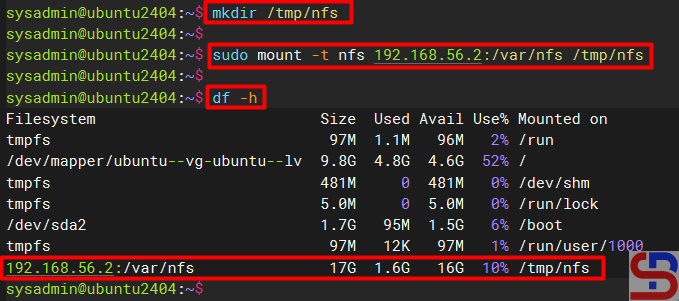
sudo mount -v -t nfs 192.168.56.2:/var/nfs /tmp/nfs to display the logs when mounting so that you can know if there is an error when mounting.
You should access the folder sharing on the NFS server as shown below:
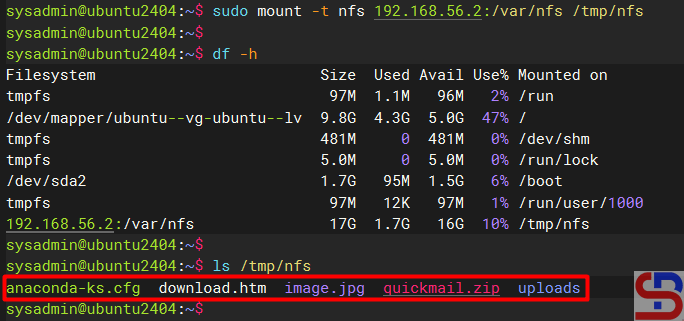
You can use the command below to see the NFS client connection:
sudo mount | grep -i nfs
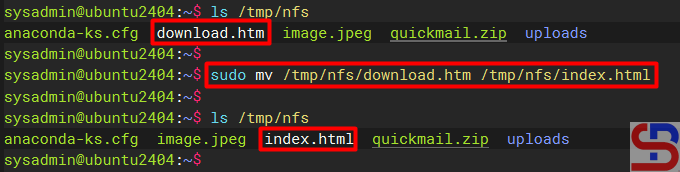
4. Simulation test
Try to do the simulation by changing the file name in the folder sharing. I try to rename the download.htm file to index.html using the command below:
sudo mv /tmp/nfs/download.htm /tmp/nfs/index.html
The file was successfully changed as shown below:
5. Configure the fstab file
To keep the folder sharing is still connected in the client after the client is rebooted, configure the /etc/fstab file using the command below:
echo '192.168.56.2:/var/nfs /tmp/nfs nfs rw 0 0' | sudo tee -a /etc/fstab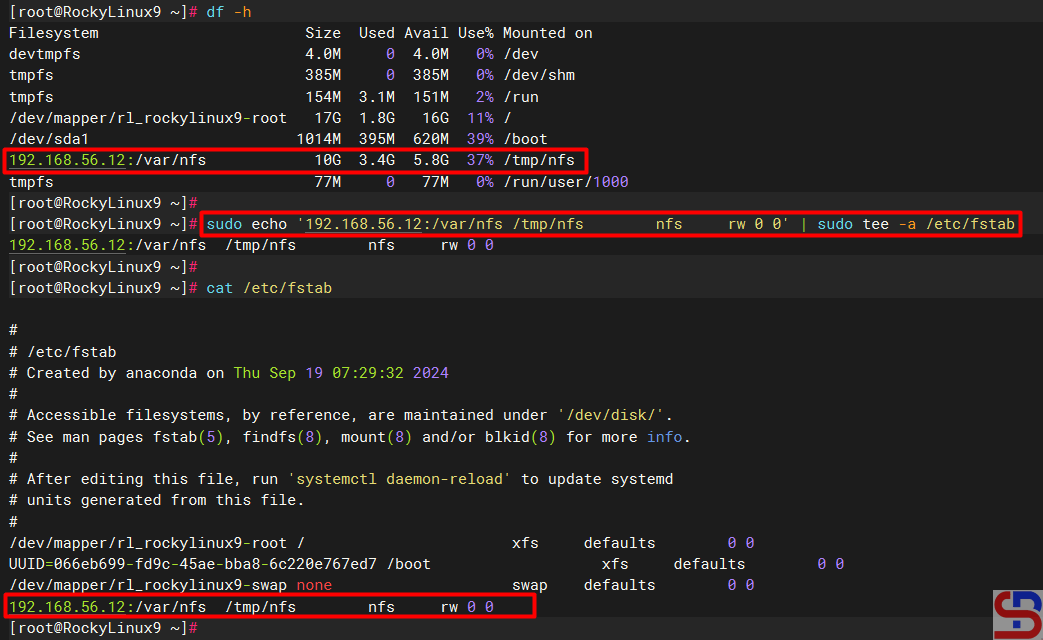
C. Errors and solutions
Below are errors that often appear and their solutions:
1. No options for /var/nfs
Sometimes when you run the exportfs -r command, there is an error as below:
exportfs: No options for /var/nfs/192.168.56.0/24(rw) : suggest (sync) to avoid warning
exportfs: Failed to stat /var/nfs/192.168.56.0/24(rw): No such file or directory

To eliminate the error, check in the /etc/exports file and you have to fix the writing in the file from:
/var/nfs/192.168.56.0/24(rw)
changed into
/var/nfs 192.168.56.0/24(rw)
After that, run the exportfs -r command again and the error should disappear.
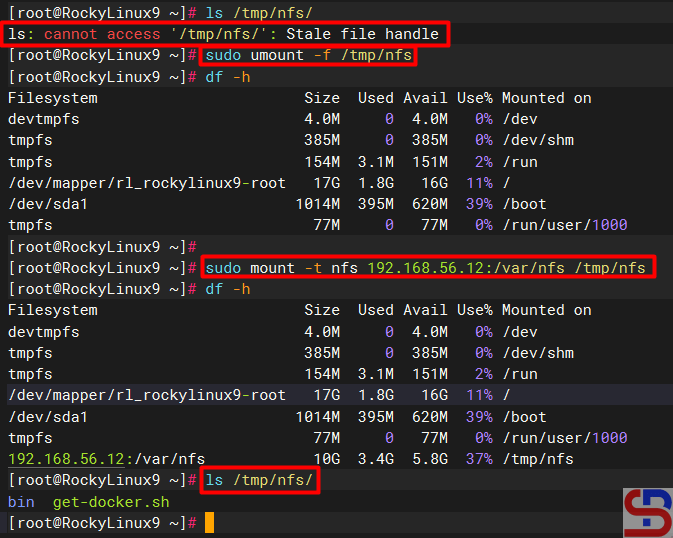
2. Error Stale file handle
When you want to connect a client to the NFS server there is an error like the below (usually this happens if there is an error like number 1 or other causes on the NFS server):
Stale file handle

To solve this error you have to unmount on the side of the client and then mount back as shown below:
3. RPC: Program not registered
When typing the showmount -e command on the NFS server there is an error as below:
clnt_create: RPC: Program not registered

The solution is that you have to run the command below so that the nfs-mountd service runs on the server:
systemctl start nfs-mountd
4. Permission denied
When you want to connect to the NFS server or when you want to change the file in the NFS, there is an error like this:
Permission denied

The solution is to check the exports file on the NFS server and make sure that the folder has been given permissions as in step 5 in the server section.
Note
If you want to block an IP address of a host so the host can’t access the NFS server, use the command below to block the IP host:
sudo firewall-cmd --permanent --add-rich-rule='rule family="ipv4" source address="192.168.56.100" port port="2049" protocol="tcp" reject'
sudo firewall-cmd --permanent --add-rich-rule='rule family="ipv4" source address="192.168.56.100" port port="111" protocol="tcp" reject'
sudo firewall-cmd --permanent --add-rich-rule='rule family="ipv4" source address="192.168.56.100" port port="2049" protocol="udp" reject'
sudo firewall-cmd --permanent --add-rich-rule='rule family="ipv4" source address="192.168.56.100" port port="111" protocol="udp" reject'
sudo firewall-cmd --reload
sudo firewall-cmd --list-rich-rules
and should the client with IP 192.168.56.100 not be able to access the folder sharing as shown in the image below:

If you want to delete an IP address of a host then the option ‐-add-rich-rule becomes ‐-remove-rich-rule so that the command becomes as command below:
sudo firewall-cmd --permanent --remove-rich-rule='rule family="ipv4" source address="192.168.56.100" port port="2049" protocol="tcp" reject'
sudo firewall-cmd --permanent --remove-rich-rule='rule family="ipv4" source address="192.168.56.100" port port="111" protocol="tcp" reject'
sudo firewall-cmd --permanent --remove-rich-rule='rule family="ipv4" source address="192.168.56.100" port port="2049" protocol="udp" reject'
sudo firewall-cmd --permanent --remove-rich-rule='rule family="ipv4" source address="192.168.56.100" port port="111" protocol="udp" reject'
sudo firewall-cmd --reload
sudo firewall-cmd --list-rich-rules
References

