If you use GCP in daily operations, it is recommended to use the commands in the CLI known as gcloud. This is because many commands can only be executed using gcloud rather than using the Console in the browser.
Problem
How to install gcloud on RockyLinux?
Solution
Before you access GCP and run GCP commands through your server, you must first install gcloud on your server.
A. Install gcloud
As far as I know, there are 2 methods to install gcloud on RockyLinux/AlmaLinux/CentOS, and both methods recommend using a user other than root.
1. Using the script
Before you download the script, install the packages using the command below:
yum install tar curl
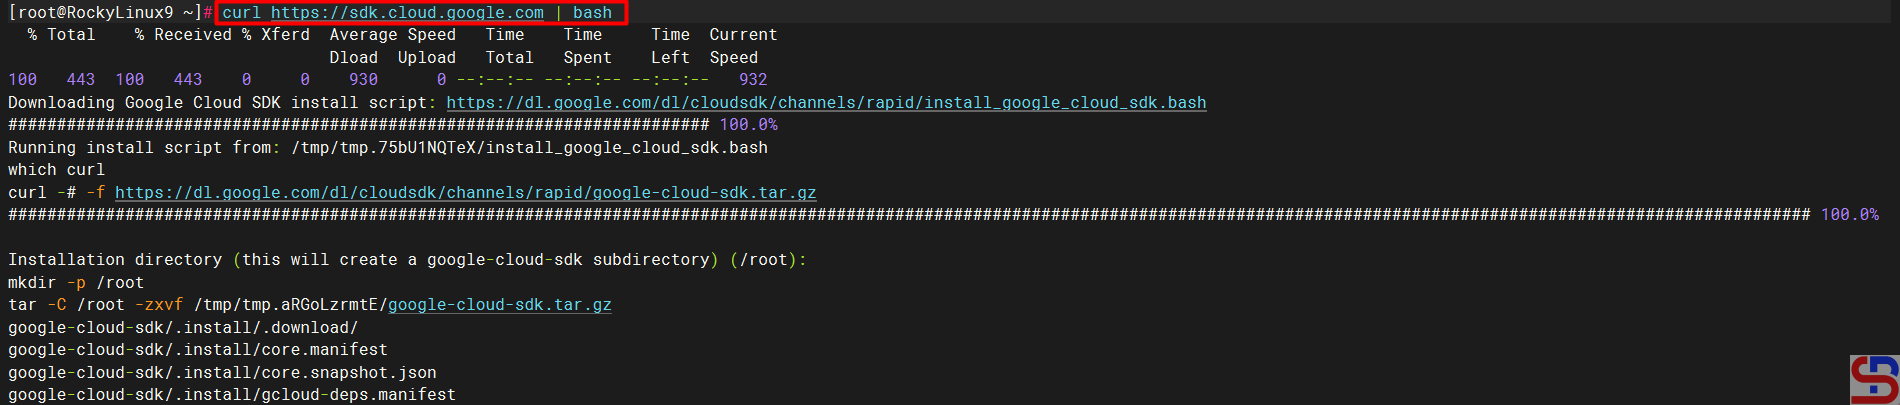
Use the command below to download and install the script:
curl https://sdk.cloud.google.com | bash
Then you will see a display like the one below:
Wait until it’s finished, and you will see a display like the one below:
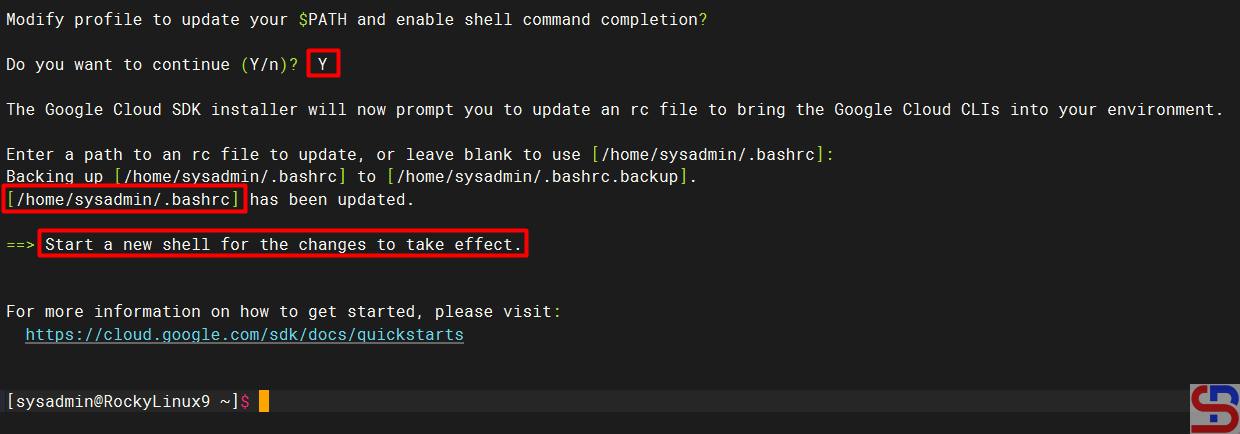
From the image above, you are asked to create a new SSH connection so that the effect can be seen, and type the command below:
gcloud version
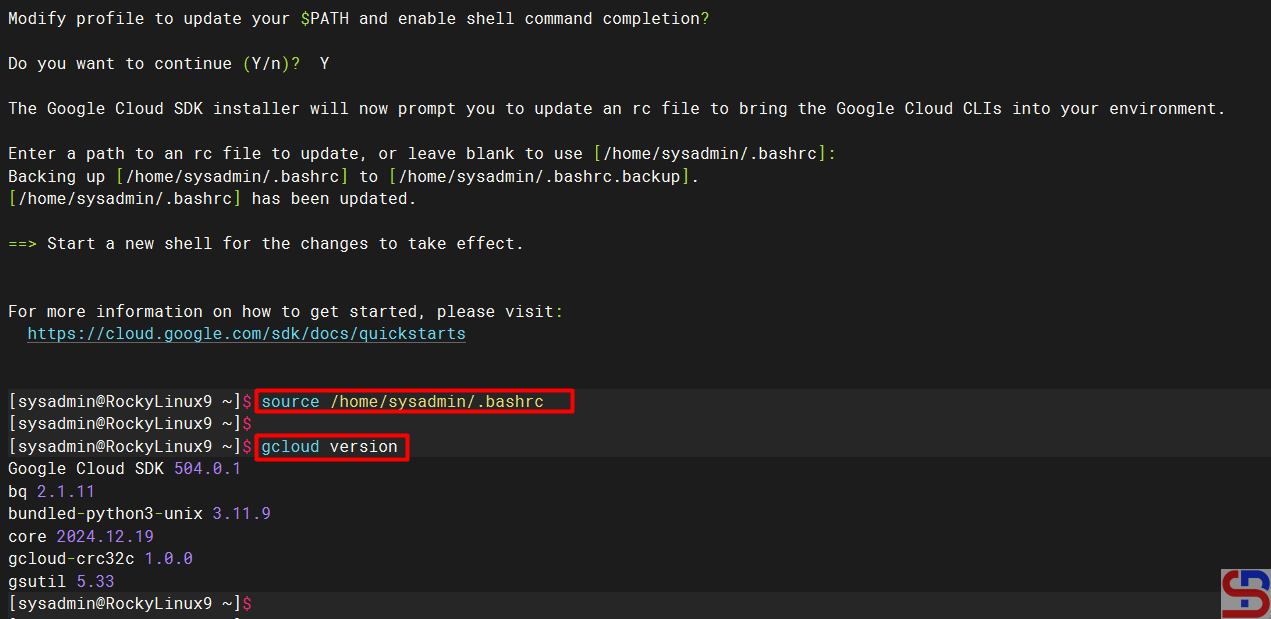
However, you can use the command below:
source /home/sysadmin/.bashrc
So you don’t need to create a new SSH connection to run the gcloud version command, which results in the image below:
2. Using the Repository
You have to add the Google Cloud SDK repository to your server using the following command:
sudo tee -a /etc/yum.repos.d/google-cloud-sdk.repo << EOM
[google-cloud-cli]
name=Google Cloud CLI
baseurl=https://packages.cloud.google.com/yum/repos/cloud-sdk-el9-x86_64
enabled=1
gpgcheck=1
repo_gpgcheck=0
gpgkey=https://packages.cloud.google.com/yum/doc/rpm-package-key.gpg
EOM
After that, install gcloud using the command below:
yum install google-cloud-sdk
After the installation finishes, run the following command to test the gcloud command:
gcloud version
B. Connect to GCP
After you install gcloud on your server, type the command below:
gcloud init
Then there will be a display like the image below:

Click the Ctrl+Click button in the red box to open the link in a browser, or if you have difficulty, copy what is in the red box and place it in your browser so you will see a display like the one below:

Click on the Google account that will access GCP, then there will be a display like the image below:

Click the Continue button, then the display below will appear:

Click the Allow button, then the display below will appear:

Click the Copy button, and paste it into the CLI on your server as in the image below:

Select the project and configure the zone as in the image above. After that, the gcloud configuration is complete.
C. Test gcloud
Now, try gcloud to access your GCP. I try to list my virtual machine in GCP using the below command:
gcloud compute instances list
Then the display below will appear:

If you get a display like the image above, you have successfully used your gcloud to access your GCP.
Note
If you have many projects on your GCP, you can choose one of these projects as the starting point for your gcloud on GCP. You can switch projects using the command:
gcloud config set project PROJECT_IDChange PROJECT_ID to the project ID you want to switch to.
References
liquidweb.com
cloud.google.com
bacancytechnology.com

