How to Display the Total Size of the Entire MariaDB Database in the CLI?
written by sysadmin | 10 September 2025
I want to know the total size of the entire MariaDB database.
Problem
How to display the total size of the entire MariaDB database in the CLI?
Solution
There are two methods for displaying the total size of the entire MariaDB database in the CLI:
1. Using a query
If you have entered the MariaDB database, you can use the command below to display the total size of a MariaDB database:
SELECT table_schema AS "Database",
ROUND(SUM(data_length + index_length) / 1024 / 1024, 2) AS "Size (MB)"
FROM information_schema.TABLES
GROUP BY table_schema;
The above query will display the total size of the entire MariaDB database in MegaBytes (MB) as shown in the image below:
Display the total size of the databases using the query in Megabytes
If you want to display in Gigabytes (GB), use the command below:
SELECT table_schema AS "Database",
ROUND(SUM(data_length + index_length) / 1024 / 1024 / 1024, 2) AS "Size (GB)"
FROM information_schema.TABLES
GROUP BY table_schema;
so that it will display as shown in the image below:
Display the total size of the databases using the query in GigaBytes
2. Using Linux Command
If you want to display the total size of the entire MariaDB database using Linux commands, use the command below:
mariadb -u root -p -e "
SELECT table_schema AS 'Database',
ROUND(SUM(data_length + index_length) / 1024 / 1024, 2) AS 'Size (MB)'
FROM information_schema.TABLES
GROUP BY table_schema;"
If you run the above command, it will display like the image below:
Display the total size of the databases using the Linux command in Megabytes
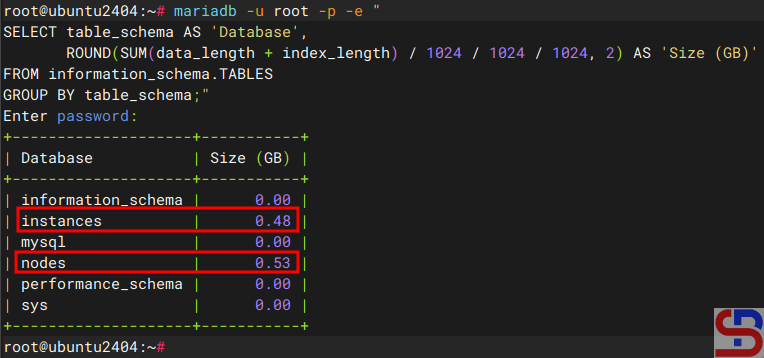
If you want to display it in GigaBytes, use the command below:
mariadb -u root -p -e "
SELECT table_schema AS 'Database',
ROUND(SUM(data_length + index_length) / 1024 / 1024 / 1024, 2) AS 'Size (GB)'
FROM information_schema.TABLES
GROUP BY table_schema;"
and it will display like the image below:
Display the total size of the databases using the Linux command in Gigabytes
Or in a short time, you can use the Linux command below to see the total size of the entire database in MariaDB:
cd /var/lib/mysql/
du -sh *
Display the total size of the databases using the Linux command
Note
If you want to display the total size of the entire MariaDB database in KiloBytes, then in the ROUND(SUM(data_length + index_length) section, simply divide it by 1024 so that it becomes as follows:
mariadb -u root -p -e "
SELECT table_schema AS "Database",
ROUND(SUM(data_length + index_length) / 1024 , 2) AS "Size (KB)"
FROM information_schema. TABLES
GROUP BY table_schema;"
And if you want to display in TeraBytes size, then in the ROUND(SUM(data_length + index_length) section, divide by 1024 4 times, so that the command is as follows:
mariadb -u root -p -e "
SELECT table_schema AS 'Database',
ROUND(SUM(data_length + index_length) / 1024 / 1024 / 1024 / 1024 , 2) AS 'Size (KB)'
FROM information_schema.TABLES
GROUP BY table_schema;"
How to Fix the Hard Disk Size After Deleting Large Files?
written by sysadmin | 10 September 2025
I once deleted large files on my Linux server, but when I saw the disk size using the df -h command, it turned out that the hard disk size on the server had not changed.
Problem
How to fix the hard disk size after deleting large files?
Solution
I have a Linux server that has a hard disk size as shown below:
Initial Harddisk size
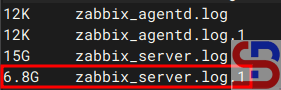
And you see the partition / only 17 percent left, and I want to delete large files on the server. After seeing in various partitions, I saw a large file in the log folder, as shown below:
The big file
And I did the command to delete the file. But after deletion, the size of the hard drive on the server is still the same as in the image above. After I find out the reason why the hard disk size has not changed, it turns out this is due to the deleted files still held open by a process commonly known as the zombie file. As a result, the system cannot release the disk space occupied by these files. Because these files are marked as deleted, the df and du commands cannot account for their space usage. So, to see files that are still open by a process, use the lsof command. If on your Linux server, there is no lsof package, use the commands below to install the lsof package:
RockyLinux/AlmaLinux/CentOS
dnf install lsof
Ubuntu/Debian
sudo apt update
sudo apt install lsof
Use the command below to see the deleted files still held open by a process:
lsof +L1
And in my case, it will look like in the image below:
The file(s) are still open by a process
After that, use the command to delete the files using the kill command based on the pid number, as shown in the image below:
kill -9 111119 119254 119255 119256
And the above command should delete the process that uses the PID number, as shown in the image below:
The files that we have deleted are no longer on the list
And if you run the df -h command, the size of the hard disk on the Linux server should be reduced according to the size of the files that we deleted earlier, like in the image below:
The final hard disk size
Note
If, after you delete using a kill based on the PID number, but the size of the hard disk on the Linux server still hasn’t changed, then the server must be restarted, and after you restart the server, the size of the hard disk will correspond to the number of files you deleted earlier.
After you install the Nagios application on the Ubuntu/Debian server, by default, Nagios Core does not provide a web-based interface to manage Nagios configuration for adding/deleting/changing hosts and services. Therefore, some developers create a web-based interface so users can manage the hosts and services easily. This article will explain how to install the NagiosQL application to set up the device or service on Nagios.
Problem
How to install NagiosQL in Ubuntu/Debian?
Solution
NagiosQL is a professional, web-based configuration tool for Nagios 2.x/3.x/4.x and other Nagios-based monitoring tools. It is designed for large enterprise requirements as well as small environments, and any Nagios functionality is supported. I ran the steps below in Ubuntu 24.04, and I think it will work in Debian too. Here are the steps to install the NagioSQL application, and
A. Install the dependencies
Use the following command to install the dependencies:
Type your root password and then run the following commands to create a database for NagiosQL:
CREATE DATABASE nagiosql;
GRANT ALL PRIVILEGES ON nagiosql.* TO `nagiosql_user`@`%` IDENTIFIED BY 'qwerty';
FLUSH PRIVILEGES;
E. Download NagiosQL
Download the latest release of the NagiosQL application, as of this writing (August 2025), has reached version 3.5.0, and configure it by typing the commands below:
cd /tmp/
wget https://sourceforge.net/projects/nagiosql/files/latest/download -O nagiosql.tar.gz
tar -zxvf nagiosql.tar.gz
sudo cp -vprf nagiosql-*/ /usr/local/nagios/share/nagiosql
F. Configure files and folders
Copy the commands below to configure files and folders:
Next, configure the application in the browser by typing the command in the browser:
http://your_ip_server/nagios/nagiosql
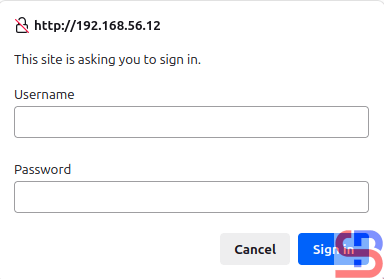
If the browser asks to insert the username and password, insert your Nagios username and password.
Insert username and password
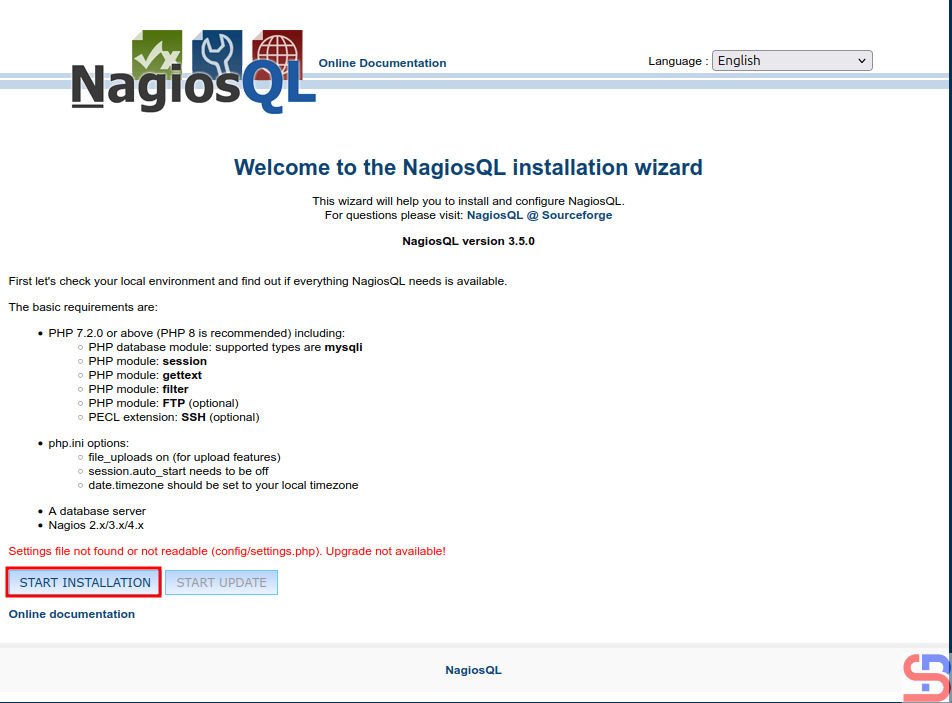
After you insert the password, there will be a display like this:
Configure the NagiosQL button
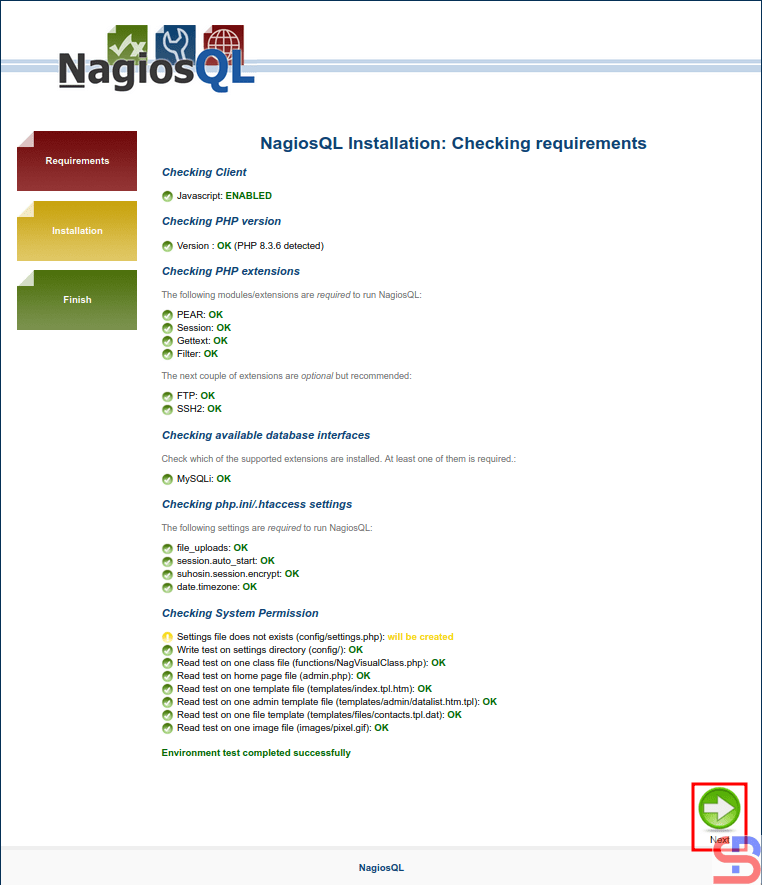
Click the START INSTALLATION button, and there is a display like the image below:
Checking requirements
Make sure there is no error like in the image above. Click the Next button, and it will be an image like this:
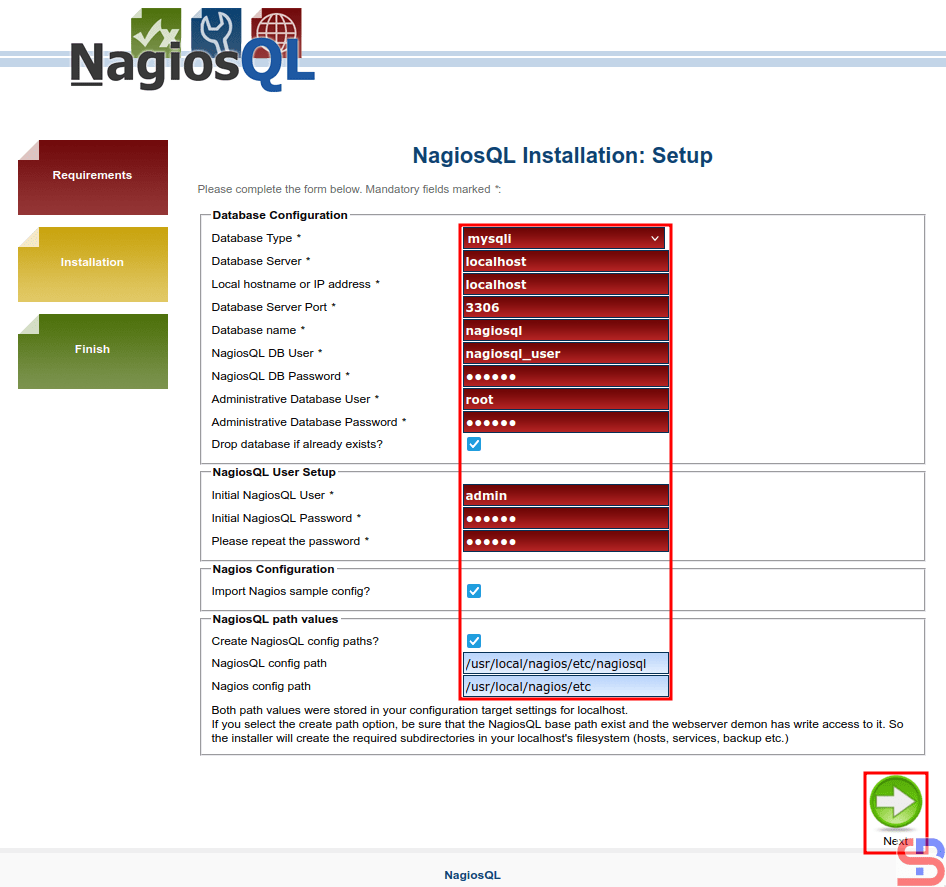
Setup NagiosQL
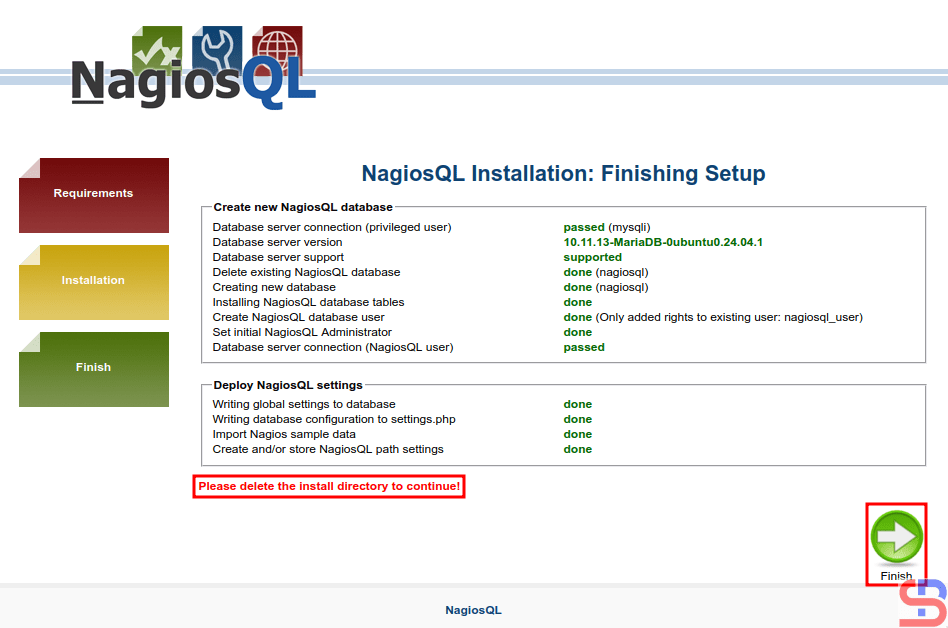
You must fill in the configuration columns, and I fill in like in this image above. After you fill it out, press the Next button, and there is a display like the image below:
The finishing setup
Before you click the Finish button, use the command below to delete the install directory:
rm -rf /usr/local/nagios/share/nagiosql/install/
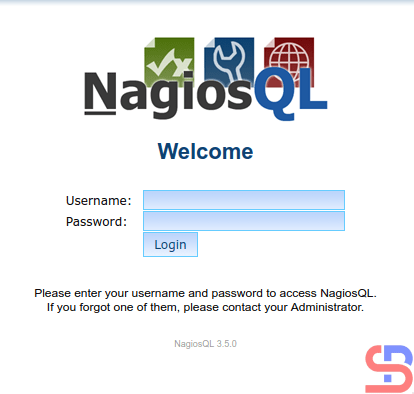
After that, click the Finish button, and it should display an image like the image below:
The NagiosQL login
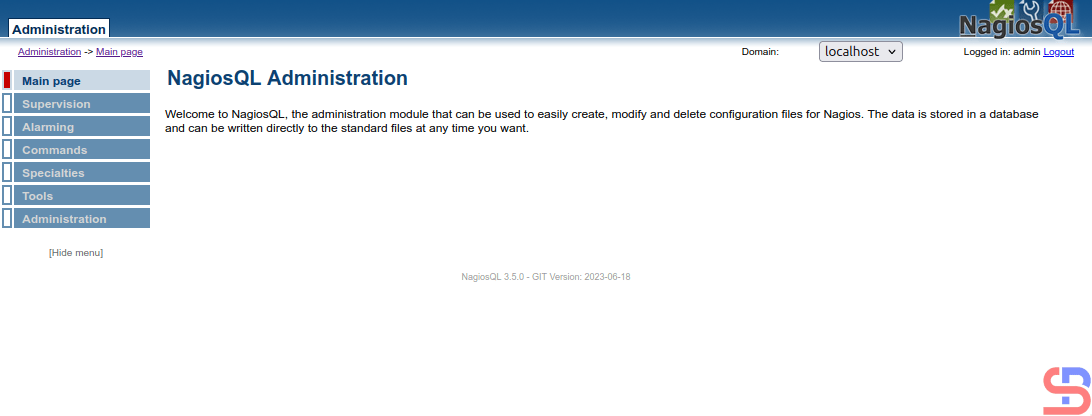
Enter the username (admin) and password, and if nothing is wrong, the NagiosQL application will appear like the image below:
The page of NagioQL administration
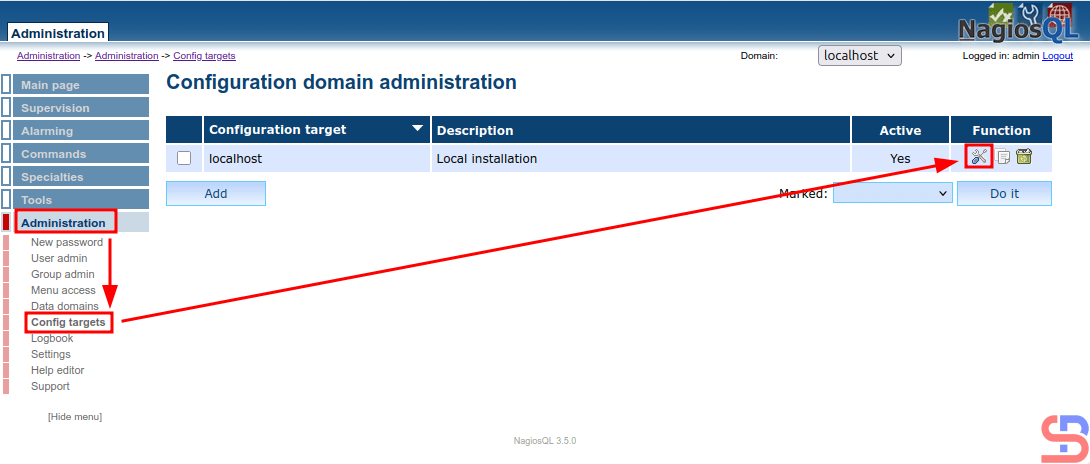
Now, configure the NagiosQL application to integrate it with Nagios. Click Administration > Config targets > Modify, like in the image below:
Configure domain administration
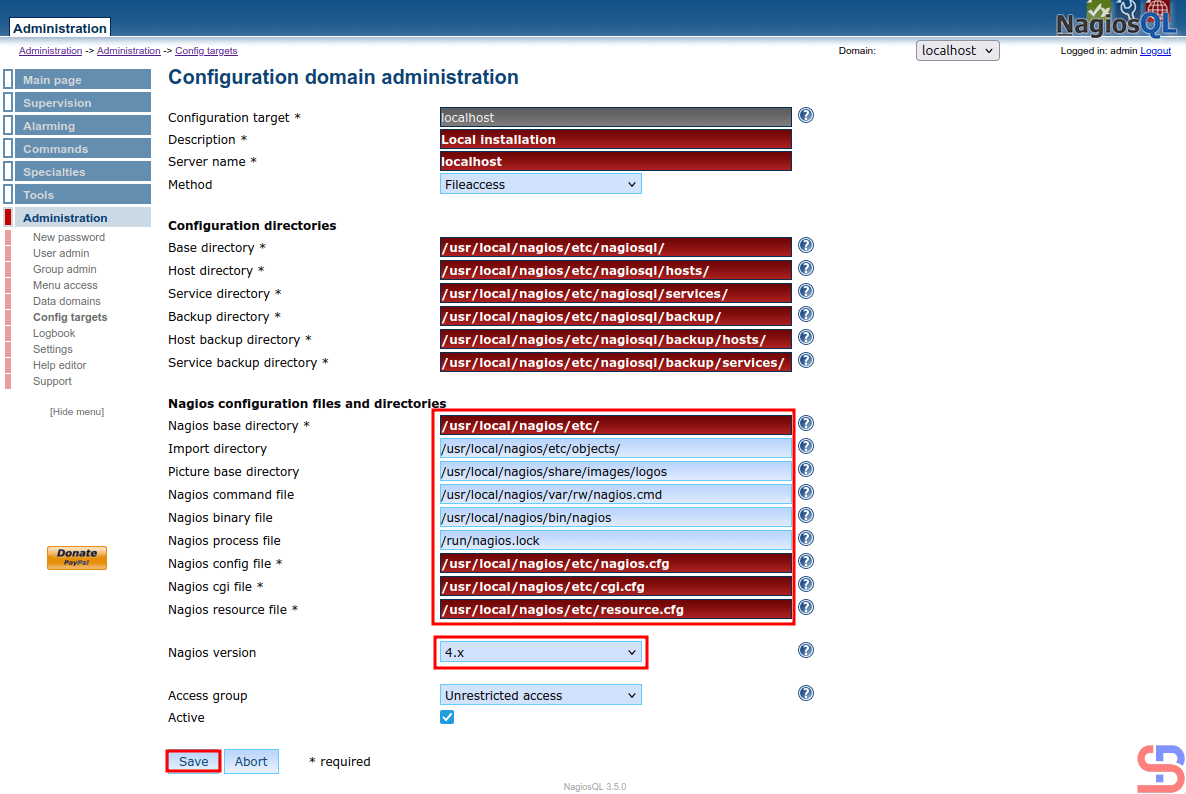
And there will be a display like the image below:
Configure the NagiosQL
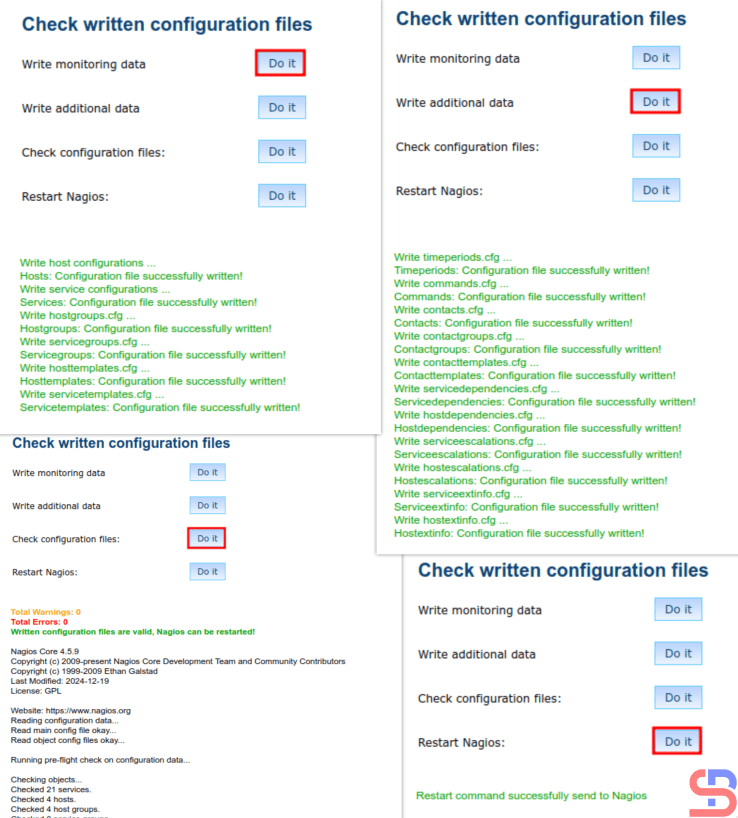
Configure in the red box like my configuration in the image above, and click the Save button. After that, go to Tools > Nagios control and click all the buttons like the image below, and make sure there is no error:
Click all the Do it buttons
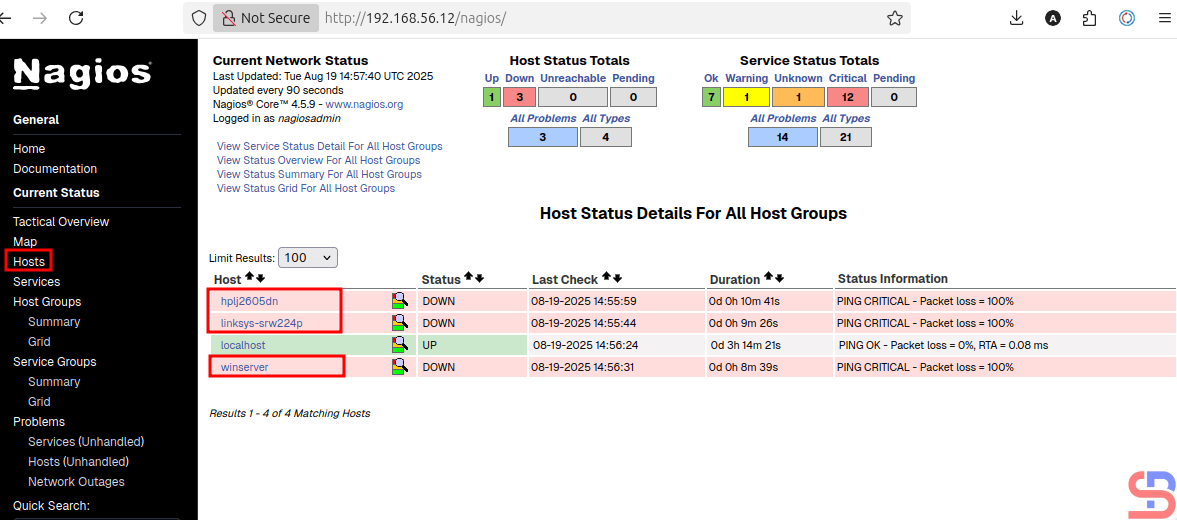
Now go to the Nagios application in the Hosts page and make sure that on the page, 3 default hosts appear in Nagios (hplj2605dn, linksys-srw224p, and winserver) besides localhost, like in the image below:
3 new hosts in the Hosts page on Nagios
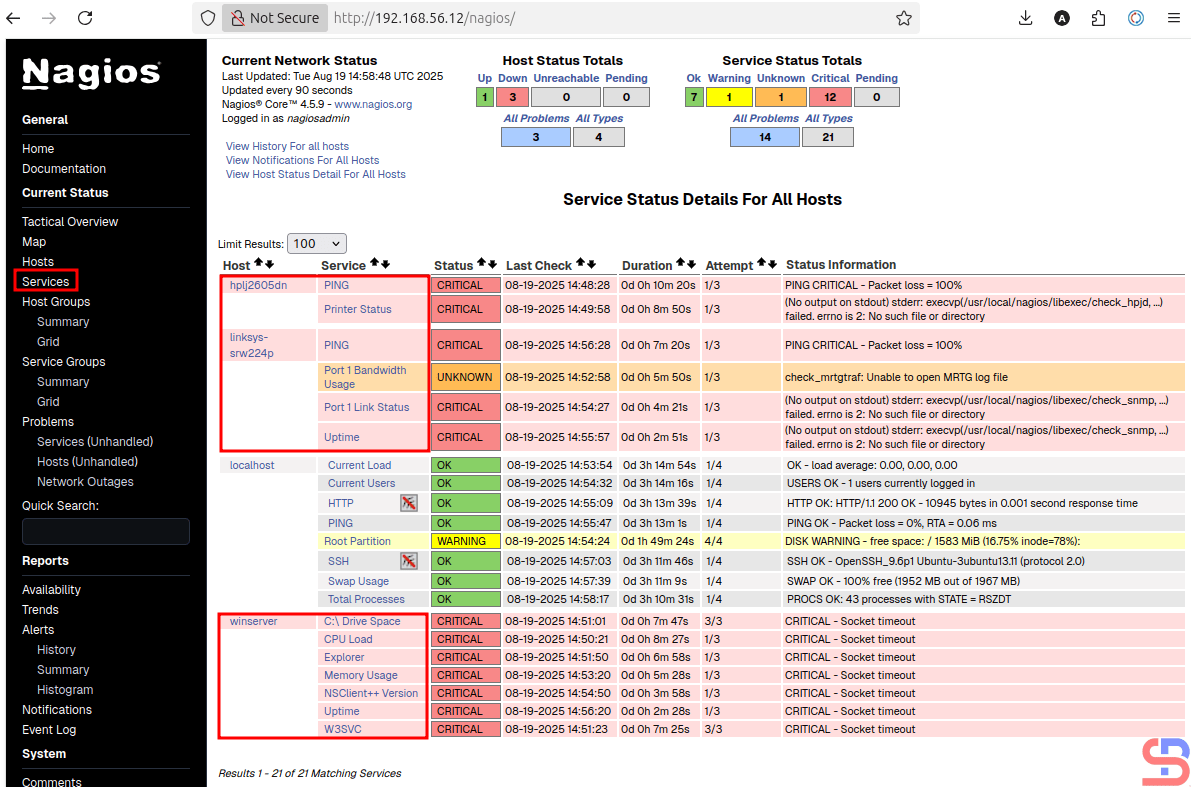
Now go to the Services section, and there should be services that appear on the 3 new default hosts:
Services in the 3 new hosts
If there are 3 additional hosts in the Hosts and Services section in Nagios, you have successfully integrated the Nagios application with the NagiosQL application.
Note
You have to be careful when filling in the Configuration domain administration section, because if it is wrong in this section, then the NagiosQL application will not run properly
How to Convert the Comma(s) into the Space(s) on a Linux File?
written by sysadmin | 10 September 2025
The previous article explained how to convert spaces into commas in a Linux file. This article will explain how to convert a comma into a space on Linux.
Problem
How to convert the comma(s) into the space(s) on a Linux file?
Solution
For example, you have a test.txt file as shown below:
The test.txt file
So that the file is a comma sign into a space, then use the command below:
cat test.txt | tr ',' ' '
So the results will be like the picture below:
Convert the comma to a space using the tr command
You can also use the command below to convert the comma(s) to the space(s):
Convert the comma to a space using the sed command
Note
If your file uses other symbols besides the comma symbol, for example, the symbol of the colon(:), just change the comma into a colon on the two commands above. For example, if you use the tr command, then use the command below:
How to Convert the Space(s) to a Comma in a Linux File?
written by sysadmin | 10 September 2025
I want to convert the space(s) in a Linux file to a comma.
Problem
How to convert the space(s) to a comma in a Linux file?
Solution
For example, you have a test.txt file as shown in the image below:
The test.txt file
Use the command below if you want to convert the space to a comma:
tr -s '[:blank:]' ',' < test.txt
So that your file will convert to the image below:
Convert a space to a comma
Not only that, the command can also be used if you have a file that has irregular spaces as shown in the image below:
Convert an irregular space to a comma
Even the above command can also convert the free space created using the Tab key, as shown in the image below:
Convert a Tab space to a comma
You can also use the below command in addition to the above command to make the space(s) in a Linux file a comma:
sed 's/\s\+/,/g' < test.txt
Convert the space(s) using the sed command
Note
If you want the free space to convert to something other than a comma, for example, to a colon (:), Then convert the comma in both commands above to become a colon as in the command below:
The previous article explained how to convert a column into a row in a Linux file. This article will explain how to convert a row into a column.
Problem
How to convert a row to a column in a Linux file?
Solution
Suppose you have a test.txt file as below:
The test.txt file
Use the command below to convert the file into a column:
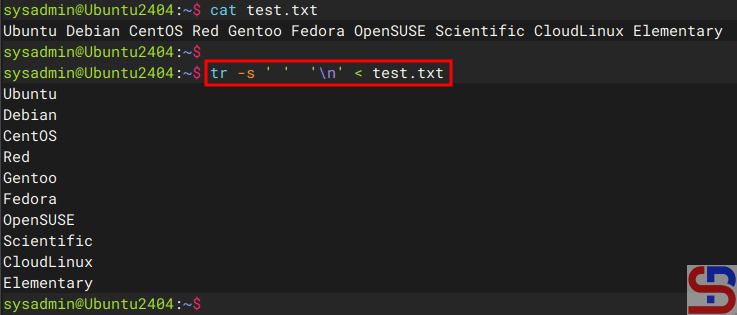
tr -s ' ' '\n' < test.txt
Then the file will become like the image below:
Using the tr command
Or you can use the command below:
fmt -1 test.txt
so that the file will be as shown in the image below:
Using the fmt command
Note
If you want to enter the results in a file, for example, the result.txt file, then you can use the standard output redirection or stdout on Linux. For example, you use the tr command to change the file, so you can use the command below:
tr -s ' ' '\n' < test.txt > result.txt
Then the results of these changes are in the result.txt file as shown below:
Using the redirection to save the result
Likewise, by using another command above, you can simply add stdout at the end of the command.